First Launch & Basic Setup
1. Accepting the license agreement
The first time you start the Editor it opens an End User License Agreement window with the full text of the agreement and two buttons:
| Button | Effect |
|---|---|
| I Accept | Accepts the agreement and starts the Editor. |
| Decline and Exit | Quits the application. Closing the window does the same. |
Your acceptance is remembered, so you are not asked again on every start — only when a new version of the agreement is published.
Up to 0.24.0 the agreement was shown only by the Windows installer, so anyone who installed from the portable ZIP, the macOS DMG or the Ubuntu package never saw it. It is now part of the Editor's own start-up on every platform, and the Windows installer no longer has a license page.
2. Enter your licence credentials
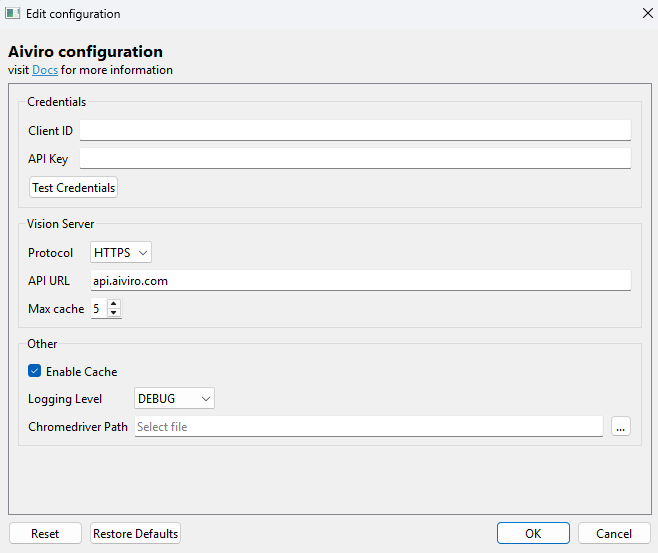
On first launch, open Settings → Edit Configuration and select the Aiviro category. Under Credentials, fill in the Client ID and API Key provided by your Aiviro representative, then click Test Credentials and wait for the success message before saving.
| Field | Description |
|---|---|
| Client ID | Your organization's licence identifier. |
| API Key | Secret key paired with the Client ID. |
| Test Credentials | Verifies the credentials against the Aiviro service and reports the result inline. |
The API Key is masked by the field itself, so it never appears in a screenshot.
3. Review the General settings
The General category holds defaults that apply to every new scenario. You can leave all of them as they are for now.
| Setting | Purpose |
|---|---|
| Default Project Folder | Where the Save Project dialog starts. |
| Theme | System, Light or Dark interface theme. From 0.25.0 the splash screen shown while the Editor starts follows this setting too, instead of briefly flashing the system colours. |
| Language | Interface language of the Editor — English, Czech or German. |
| Default Animation Timeout | How long the robot waits for UI animations to settle before looking at the screen. |
| Default Find Timeout | How long a search for an element may take before it fails. |
| Default wait after timeout | Default value of the Wait after parameter on new actions. |
| Always show additional options | When on, the Advanced options group is expanded on every action form. |
| Auto Load Cycle Iterable | Whether loop collections are loaded automatically — Ask, Always or Never. |
| Button text visibility | Show or hide text labels next to toolbar icons. |
| Default scenario locale, Default date and time format, Default date format, Default decimal format | Localization defaults for new scenarios; each scenario can override them in Scenario Settings → Localization. |
Under the Aiviro category you will also find:
| Setting | Purpose |
|---|---|
| Vision Server → API URL | Endpoint of the element-detection service. |
| Vision Server → Max cache / Enable Cache | Caching of detection results, which speeds up repeated work on the same screen. |
| Logging Level | DEBUG, INFO, WARNING, ERROR or CRITICAL. Use DEBUG when troubleshooting. |
| Chromedriver Path | Path to the ChromeDriver executable used by robots of type Web. |
Changes in the Aiviro category require restarting the application.
A damaged aiviro-config.yaml no longer keeps you out of the settings. The Editor falls
back to the defaults and still opens Settings → Edit Configuration, so you can repair
the file from inside the application. Configuration files are also written atomically, so a
crash while saving can no longer leave one empty.
4. Create your robot profile
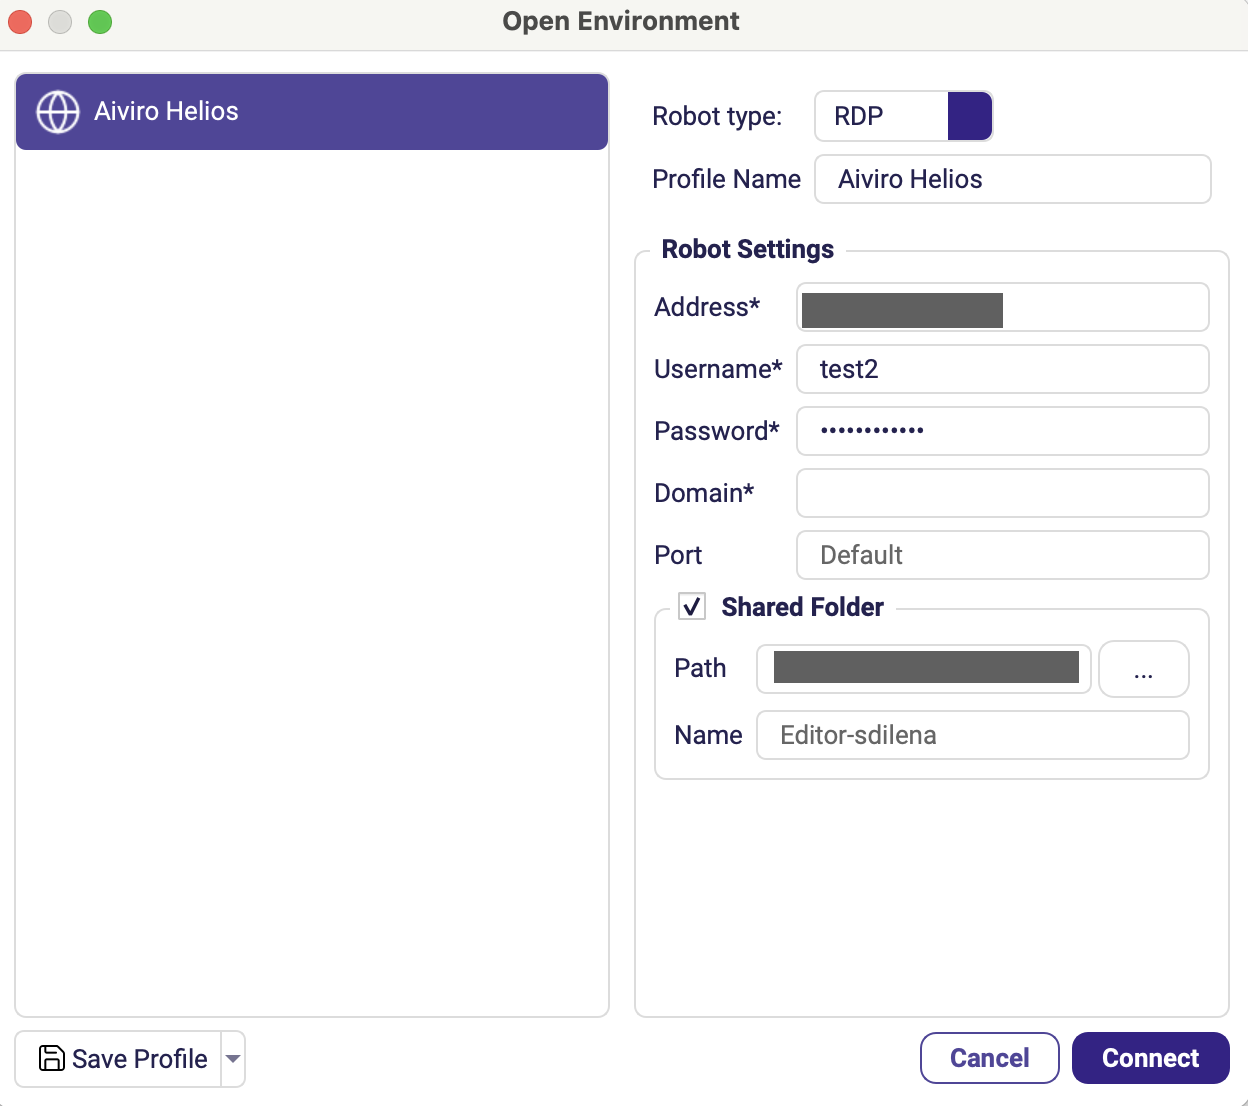
- Click Connect in the toolbar (or press Shift+R) to open the Open Environment dialog.
- Choose the Robot type — Desktop, Web or RDP.
- Enter a Profile Name and fill in the Robot Settings for the type you picked. See Robot Types & Configuration for the fields of each type.
- Save the profile so it is available next time, then click Connect.
Once the robot connects, its screen appears in the Robot view and Aiviro Editor is ready — you can start building Scenarios.
Next steps
- Walk through the Quick Start to build and schedule your first scenario.
- Store any passwords the scenario needs in the Secure Vault instead of typing them into actions.