User Interface Overview
This page walks you through the Aiviro Editor workspace.
Main window
The window is split into three tabbed areas: the scenario on the upper left, data panels on the lower left, and the working area on the right.
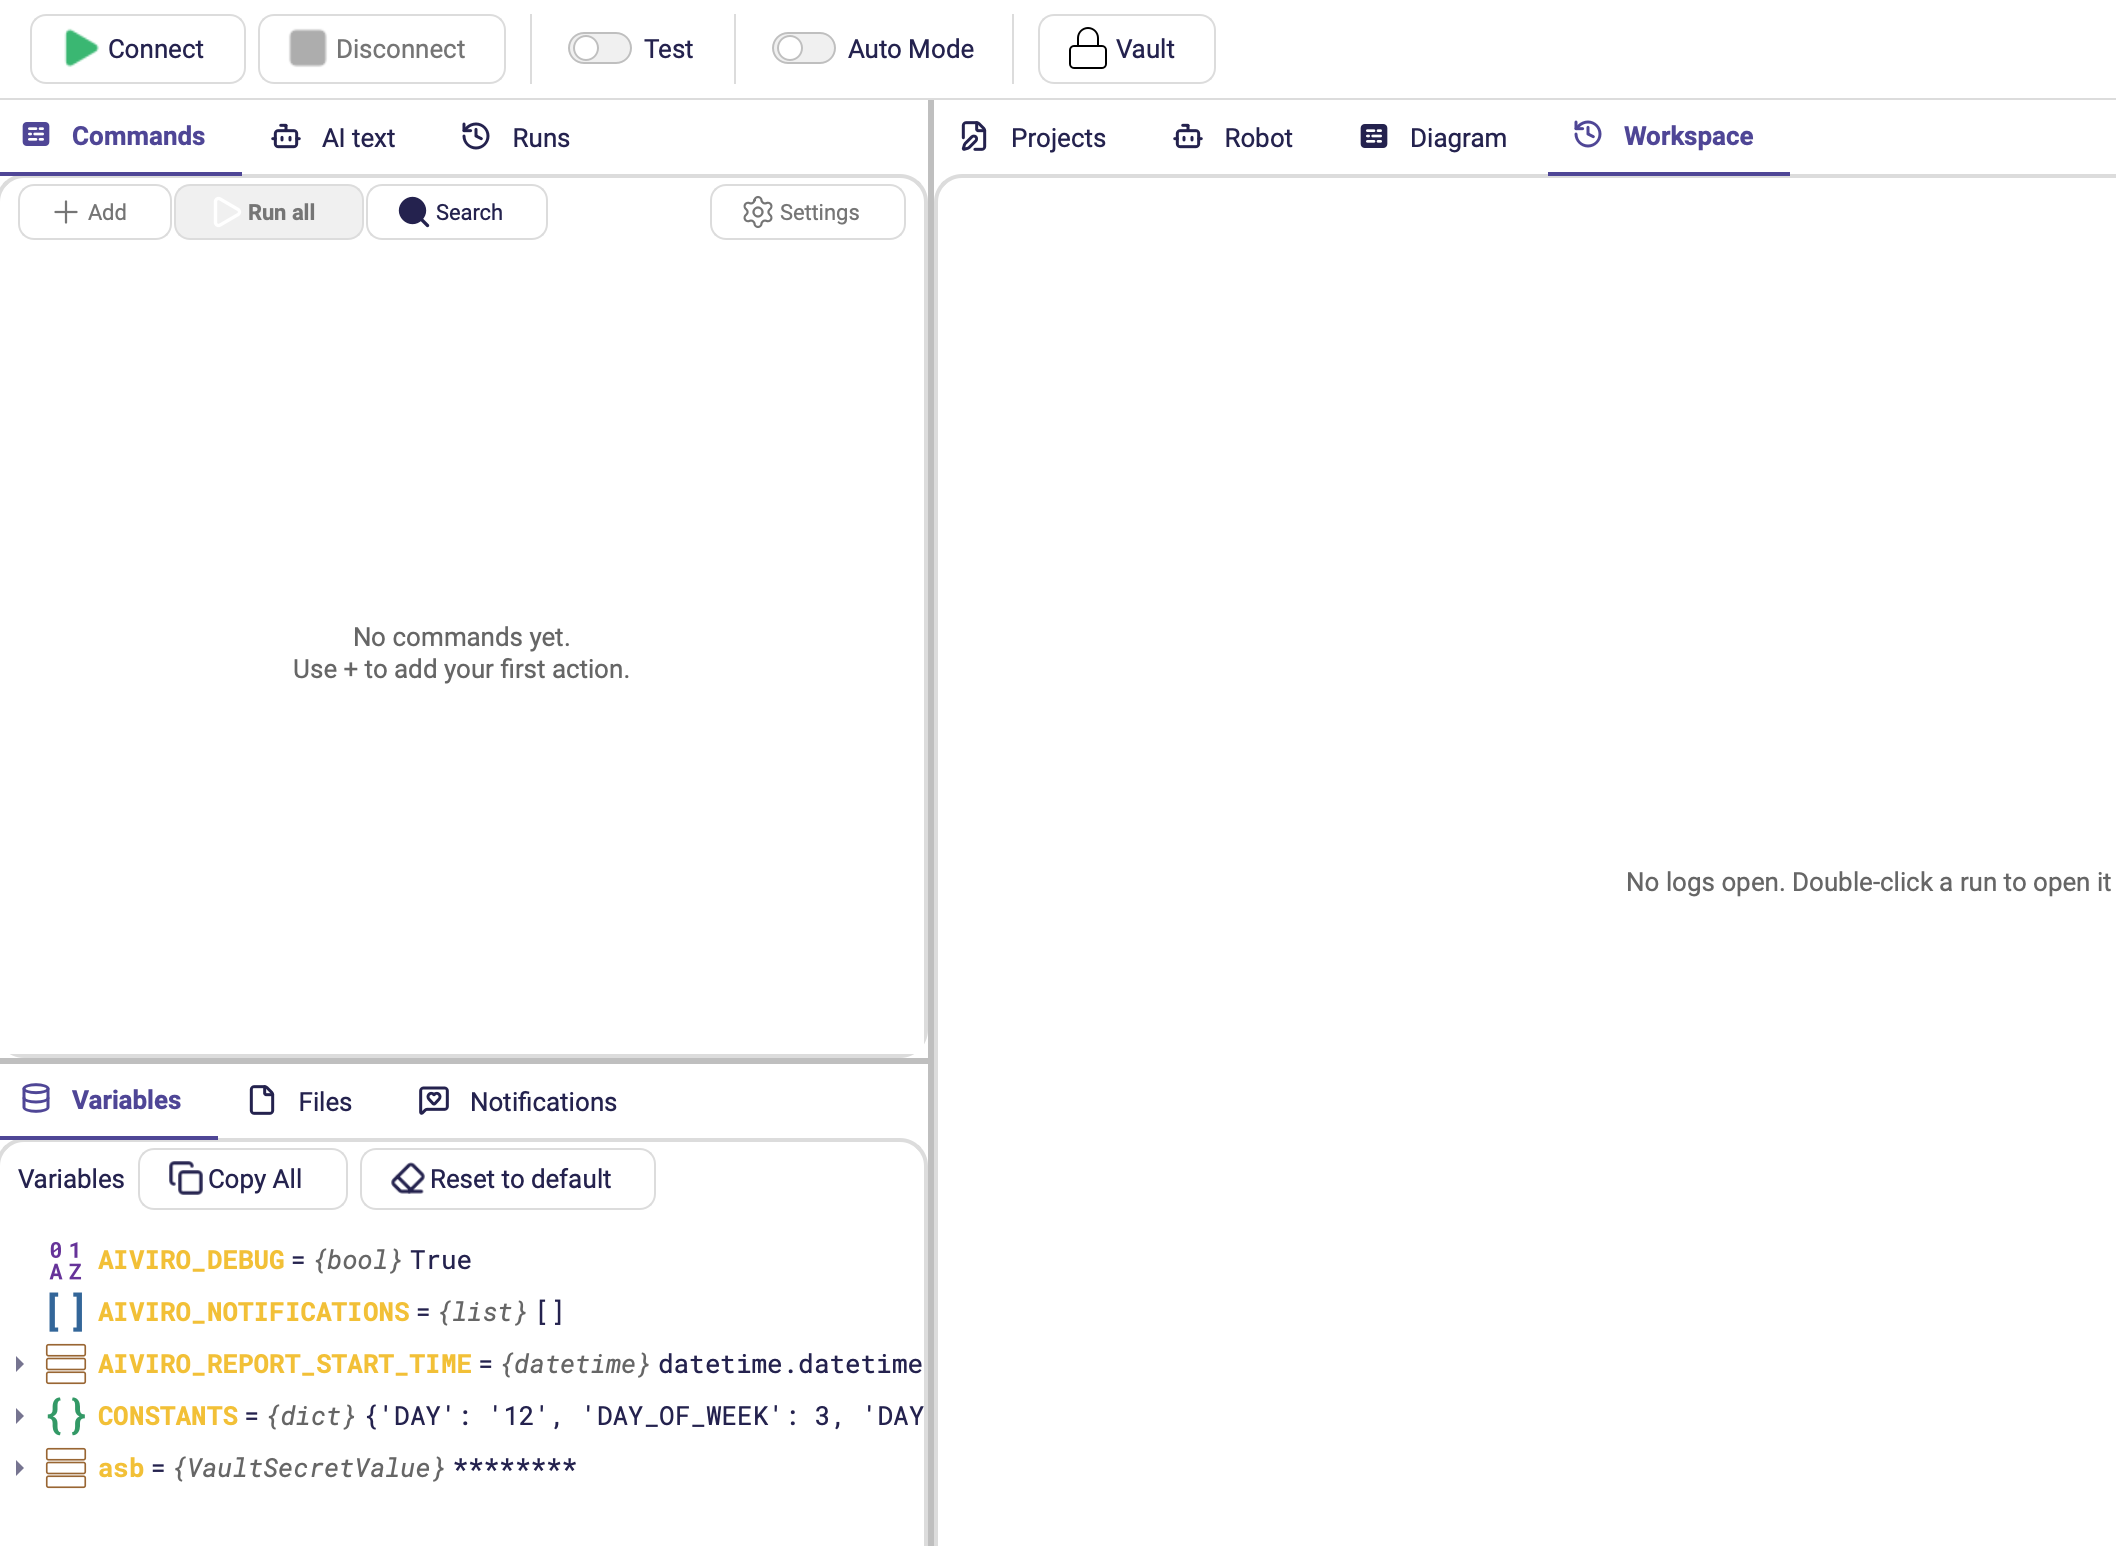
Main toolbar
| Control | Purpose |
|---|---|
| Connect | Opens the Open Environment dialog and connects to a robot profile. Shortcut Shift+R. |
| Disconnect | Closes the current robot session. |
| Test | Switches the scenario between the Test and Production environment. Actions set to Enabled (Test) or Enabled (Prod) follow this switch — see Run Action. |
| Auto Mode | Global switch that lets the Orchestrator run active scenarios on schedule. Must be On for unattended execution. |
| Vault | Opens the Secure Vault where passwords, tokens and e-mail accounts are stored. See Secure Vault. |
Upper-left tabs
| Tab | What it holds |
|---|---|
| Commands | The scenario itself — the tree of actions, with its own header: Add, AI, Run all, Stop, Search and Settings. |
| Runs | History of completed runs — see Runs panel. |
Commands header
| Control | Purpose |
|---|---|
| Add | Opens the actions menu to insert a new command into the scenario tree. |
| AI | Adds, changes or describes actions with AI, and holds the AI settings and the Scenario template switch — see AI editing. The same entries are in the right-click menu of the tree. |
| Run all | Executes the whole scenario. If commands are selected, only the selection runs. |
| Search | Toggles the Search commands… box, which filters the scenario tree. |
| Settings | Opens the Scenario Settings dialog (scheduling, timeouts, robot profile, localization). |
While a scenario is running, Stop ends it at once; the run is recorded as Cancelled - Force quit. Stop also interrupts an action that is still waiting — for an element, for the screen to settle, or for another attempt to reach an e-mail server. Up to 0.25.0 it did nothing during such a wait, so the run seemed to hang until the wait timed out.
A long Type Text is the one action that does not wait for its own end: from 0.25.0 the run checks for a stop request between typed segments, so Stop takes effect mid-typing. Up to 0.24.0 it only did that when Sleep between characters was set, which made a scenario typing a very long text impossible to interrupt.
An empty scenario shows No commands yet. Use + to add your first action.
The tree keeps your selection, scroll position and expanded items when you confirm an action's edit dialog. Up to 0.25.0 it jumped back to the top and collapsed, and long editing sessions gradually became sluggish.
Run bar
While a scenario runs, a bar above the Commands tree says what the robot is doing — for example Running · Click — and holds the run controls.
| Control | Appears when | What it does |
|---|---|---|
| Pause | The run is going. | Stops after the action the robot is on. The Editor is yours again: look around, change actions or variables, then continue from there. |
| Continue | The run is paused. | Continues where the run stopped. After a failure it first runs the failed step again. |
| Skip step | The run is paused on a failed action. | Leaves the failed step and continues with the next one. The failure is still reported when the run ends. |
To end a paused run, use Stop in the Commands header. While the AI is writing the actions of a template section, the bar says so and only Stop works. What happens when an action fails is described in When an action fails.
Lower-left tabs
| Tab | What it holds |
|---|---|
| Variables | Default and user-defined variables with their live values, plus Copy All and Reset to default. |
| Files | Shared folder (RDP) and Temp (this session). |
| Notifications | Messages collected by Add Message during the run. |
See Panels for what each one is for.
Right-hand tabs
| Tab | What it holds |
|---|---|
| Projects | Recently opened projects — see Projects tab. |
| Robot | The controlled machine's screen, with its own toolbar — see Robot tab. |
| Diagram | The scenario rendered as a flow diagram. |
| Workspace | Run logs you opened by double-clicking a run in Runs. Empty it reads No logs open. Double-click a run to open it. |
Working on two monitors
Since 0.24.0 two views can be torn out of the main window:
| View | How |
|---|---|
| A run log in Workspace | Tear the log tab off into its own window. Previously each opened log piled up as another top-level tab. |
| The Robot live view | Detach it into its own window, Attach to put it back. |
This is what makes a two-monitor setup comfortable: the scenario tree on one screen, the robot's screen or the log you are comparing against on the other.
Secrets from the Vault show up in Variables as {VaultSecretValue} ******** — the
name is visible so you can confirm the scenario picked the right key, but the value never
is.
Projects tab
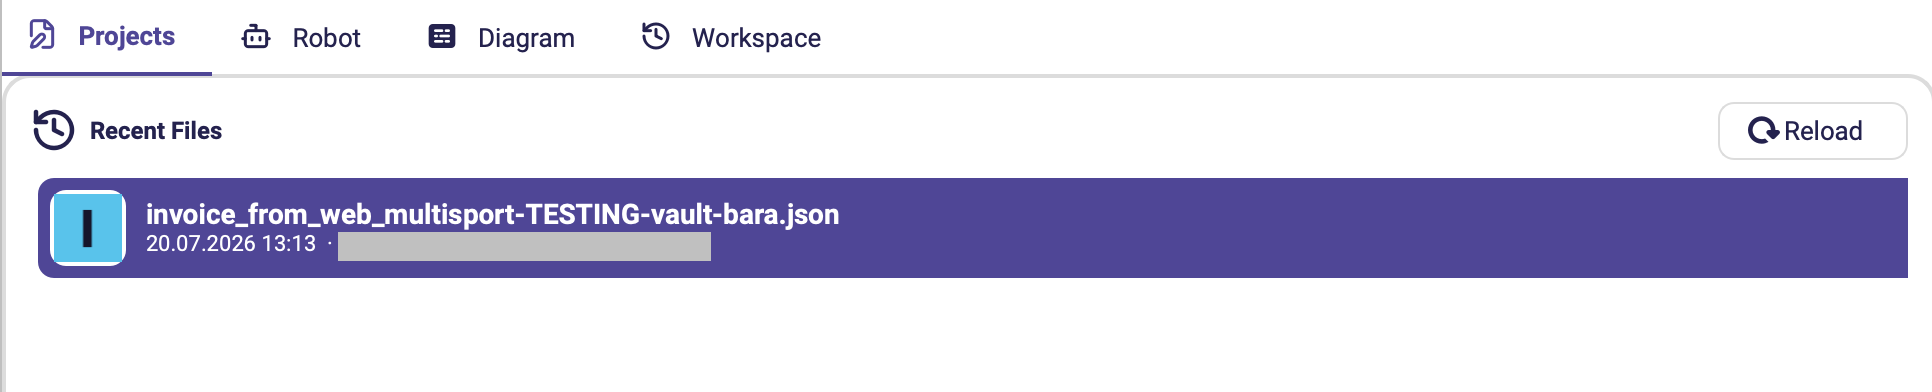
When no project is open, the Projects tab lists your Recent Files so you can jump straight back into one. Reload refreshes the list.
Menu bar
| Menu | Contents |
|---|---|
| File | New Project (Ctrl+N), Open Project (Ctrl+O), Save Project (Ctrl+S), Save Project As (Ctrl+Shift+S), Export as Python → To File / To Clipboard, Open external log → .zip log (editor) / log directory (core). |
| Edit | Undo (Ctrl+Z), Redo (Ctrl+Shift+Z). |
| Environment | Connect, Disconnect. |
| Teach | Teach robot (Shift+E), Clear (Ctrl+X). |
| Settings | Edit Configuration (including the licence Usage page), Theme → System / Light / Dark, Open config folder, plus the Debug Value and Save Variables developer helpers. |
| Help | Manual, About. |
Theme also controls the splash screen shown while the Editor starts, so it no longer flashes the system colours before the window appears.
A damaged aiviro-config.yaml no longer blocks Edit Configuration: the Editor falls
back to the defaults and still opens the dialog, so the file can be repaired from inside the
application. An unrecognised theme value falls back to the system scheme rather than
failing, and configuration files are written atomically, so a crash mid-save cannot leave
one empty.
Everything you build visually maps 1:1 to Aiviro Python SDK calls. File → Export as Python writes the whole scenario as a runnable script — useful for code review, for version control diffs, or as a starting point for a headless robot.
Robot tab
The Robot tab shows the controlled machine's screen and has its own toolbar.

| Tool | Description |
|---|---|
| Teach robot | Pauses the live view and marks every UI element the detection model recognizes. Shortcut Shift+E. |
| Zoom In / Zoom Out | Magnifies or shrinks the view. |
| Fit to View | Resets the zoom so the whole screenshot fits the pane. |
| Add New Box | Draws a new Area box for masking, cropping or defining a working area. |
| Show hidden boxes | Reveals element outlines that were previously hidden. |
Two more controls appear when they apply:
| Tool | Appears when |
|---|---|
| Clear Elements | Elements are currently highlighted. Removes the highlights and resumes the live stream. Shortcut Ctrl+X. |
| Live control | A robot that supports it is connected. When On, your mouse and keyboard input inside the view is forwarded to the controlled machine for manual interaction, and the Editor's own keyboard shortcuts are suspended so every keystroke reaches the remote machine. |
While the scenario has template sections that the AI has not written yet, the view gets a coloured frame and a strip above it, for example Template mode · 1 of 9 sections written. The run writes each such section when it reaches it — see AI editing.
With a Passive robot connected, the Robot tab is hidden: there is no screen to show. It comes back after Disconnect.
Connection state
The view tells you what the connection is doing rather than silently showing a stale frame.
| Overlay | Meaning |
|---|---|
| Connecting… | A spinner while the session is being established. If the attempt hangs, cancel it with Disconnect. |
| Reconnecting… | The link dropped. The view dims and the Editor keeps retrying for up to about 5 minutes. |
| Disconnected | The connection could not be recovered. The run fails with a clear error instead of hanging. |
Reconnection applies to the RDP robot, where a dropped VPN or remote-desktop link is the common failure.
While the robot is disconnected the run controls — Run, Run all, Run to end, Teach robot and Save and Execute — are disabled, because there is nothing to run against. They come back as soon as Connect succeeds. Disconnect clears the state too, so you can always get the controls back without restarting the Editor.
Before 0.24.0 a silently dead link left the last frame on screen forever — the run simply hung with no hint that anything was wrong.
Up to 0.24.0 a single dropped connection could also leave those controls greyed out for the rest of the session: the Editor kept treating the robot as unreachable even after a successful reconnect, and only restarting the Editor brought them back. Fixed in 0.25.0.
Panels
| Panel | What it shows | Typical use |
|---|---|---|
| Commands | Tree of actions in the active scenario, with a search box, the Add / AI / Run all controls and the run bar. | Build, reorder, disable or delete steps. |
| Variables | Default and user-defined variables with their live values, grouped in a tree. Copy All copies them out; Reset to default clears the run state. | Inspect data passed between actions while debugging. Variables are created with the Create variable action — the panel's old Prompt input was removed in 0.24.0. |
| Runs | Logs, screenshots and status of past full-scenario executions. With Auto Mode on, upcoming automatic runs also appear here, marked Scheduled, and turn into ordinary history rows once they start. | Verify unattended runs, debug failures, see what is queued — see Runs panel. |
| Workspace | Run logs you opened by double-clicking a run in Runs. | Compare two runs, or keep one log open while editing the scenario. |
| Files | Two folders: Shared folder (RDP) and Temp (this session). Right-click for Open, Copy path, Delete; the header offers Refresh, Open folder in file explorer and Clear folder. | Pick up files the robot produced, or drop files where the remote machine can read them. |
| Notifications | Messages collected by the Add Message action during the run, with their Type and Message. Clean notifications empties the list, and Preview Report renders it as the HTML e-mail report that Send As Email would deliver. | Build a human-readable run summary, and check how it will look before sending it. |
| Diagram | The scenario rendered as a flow diagram, with Zoom In/Out, Fit to View, 100% (reset zoom), Expand All, Collapse All and Export to PNG. | Review or document the overall flow; export the picture for a specification. |
The Diagram view
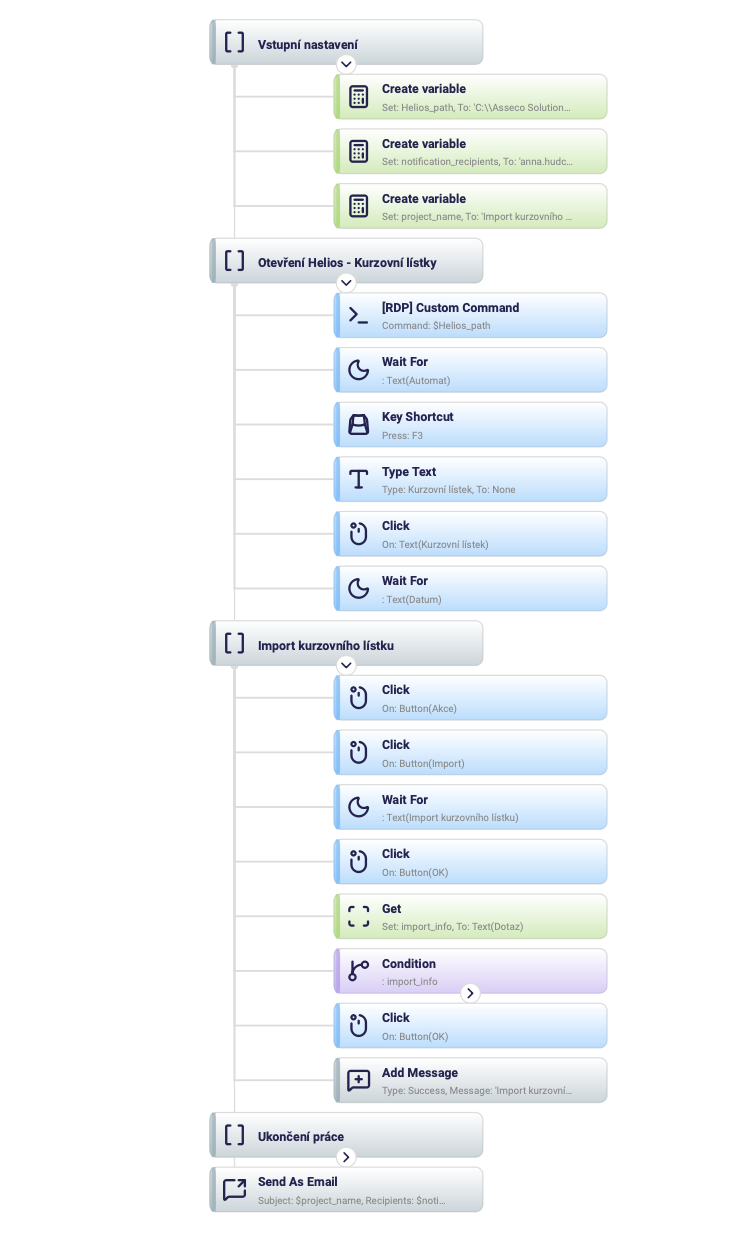
Each node shows the action's name and a one-line summary of what it does — On: Button(OK),
Press: F3, Set: import_info, To: Text(Dotaz) — so you can read the whole flow without
opening a single form. Nodes are tinted by group, and Section headers and Condition
branches collapse behind the chevron.
Note how variables are referenced: Command: $Helios_path, Subject: $project_name. A
$ in front of a name inserts that variable's value — see
Referencing variables.
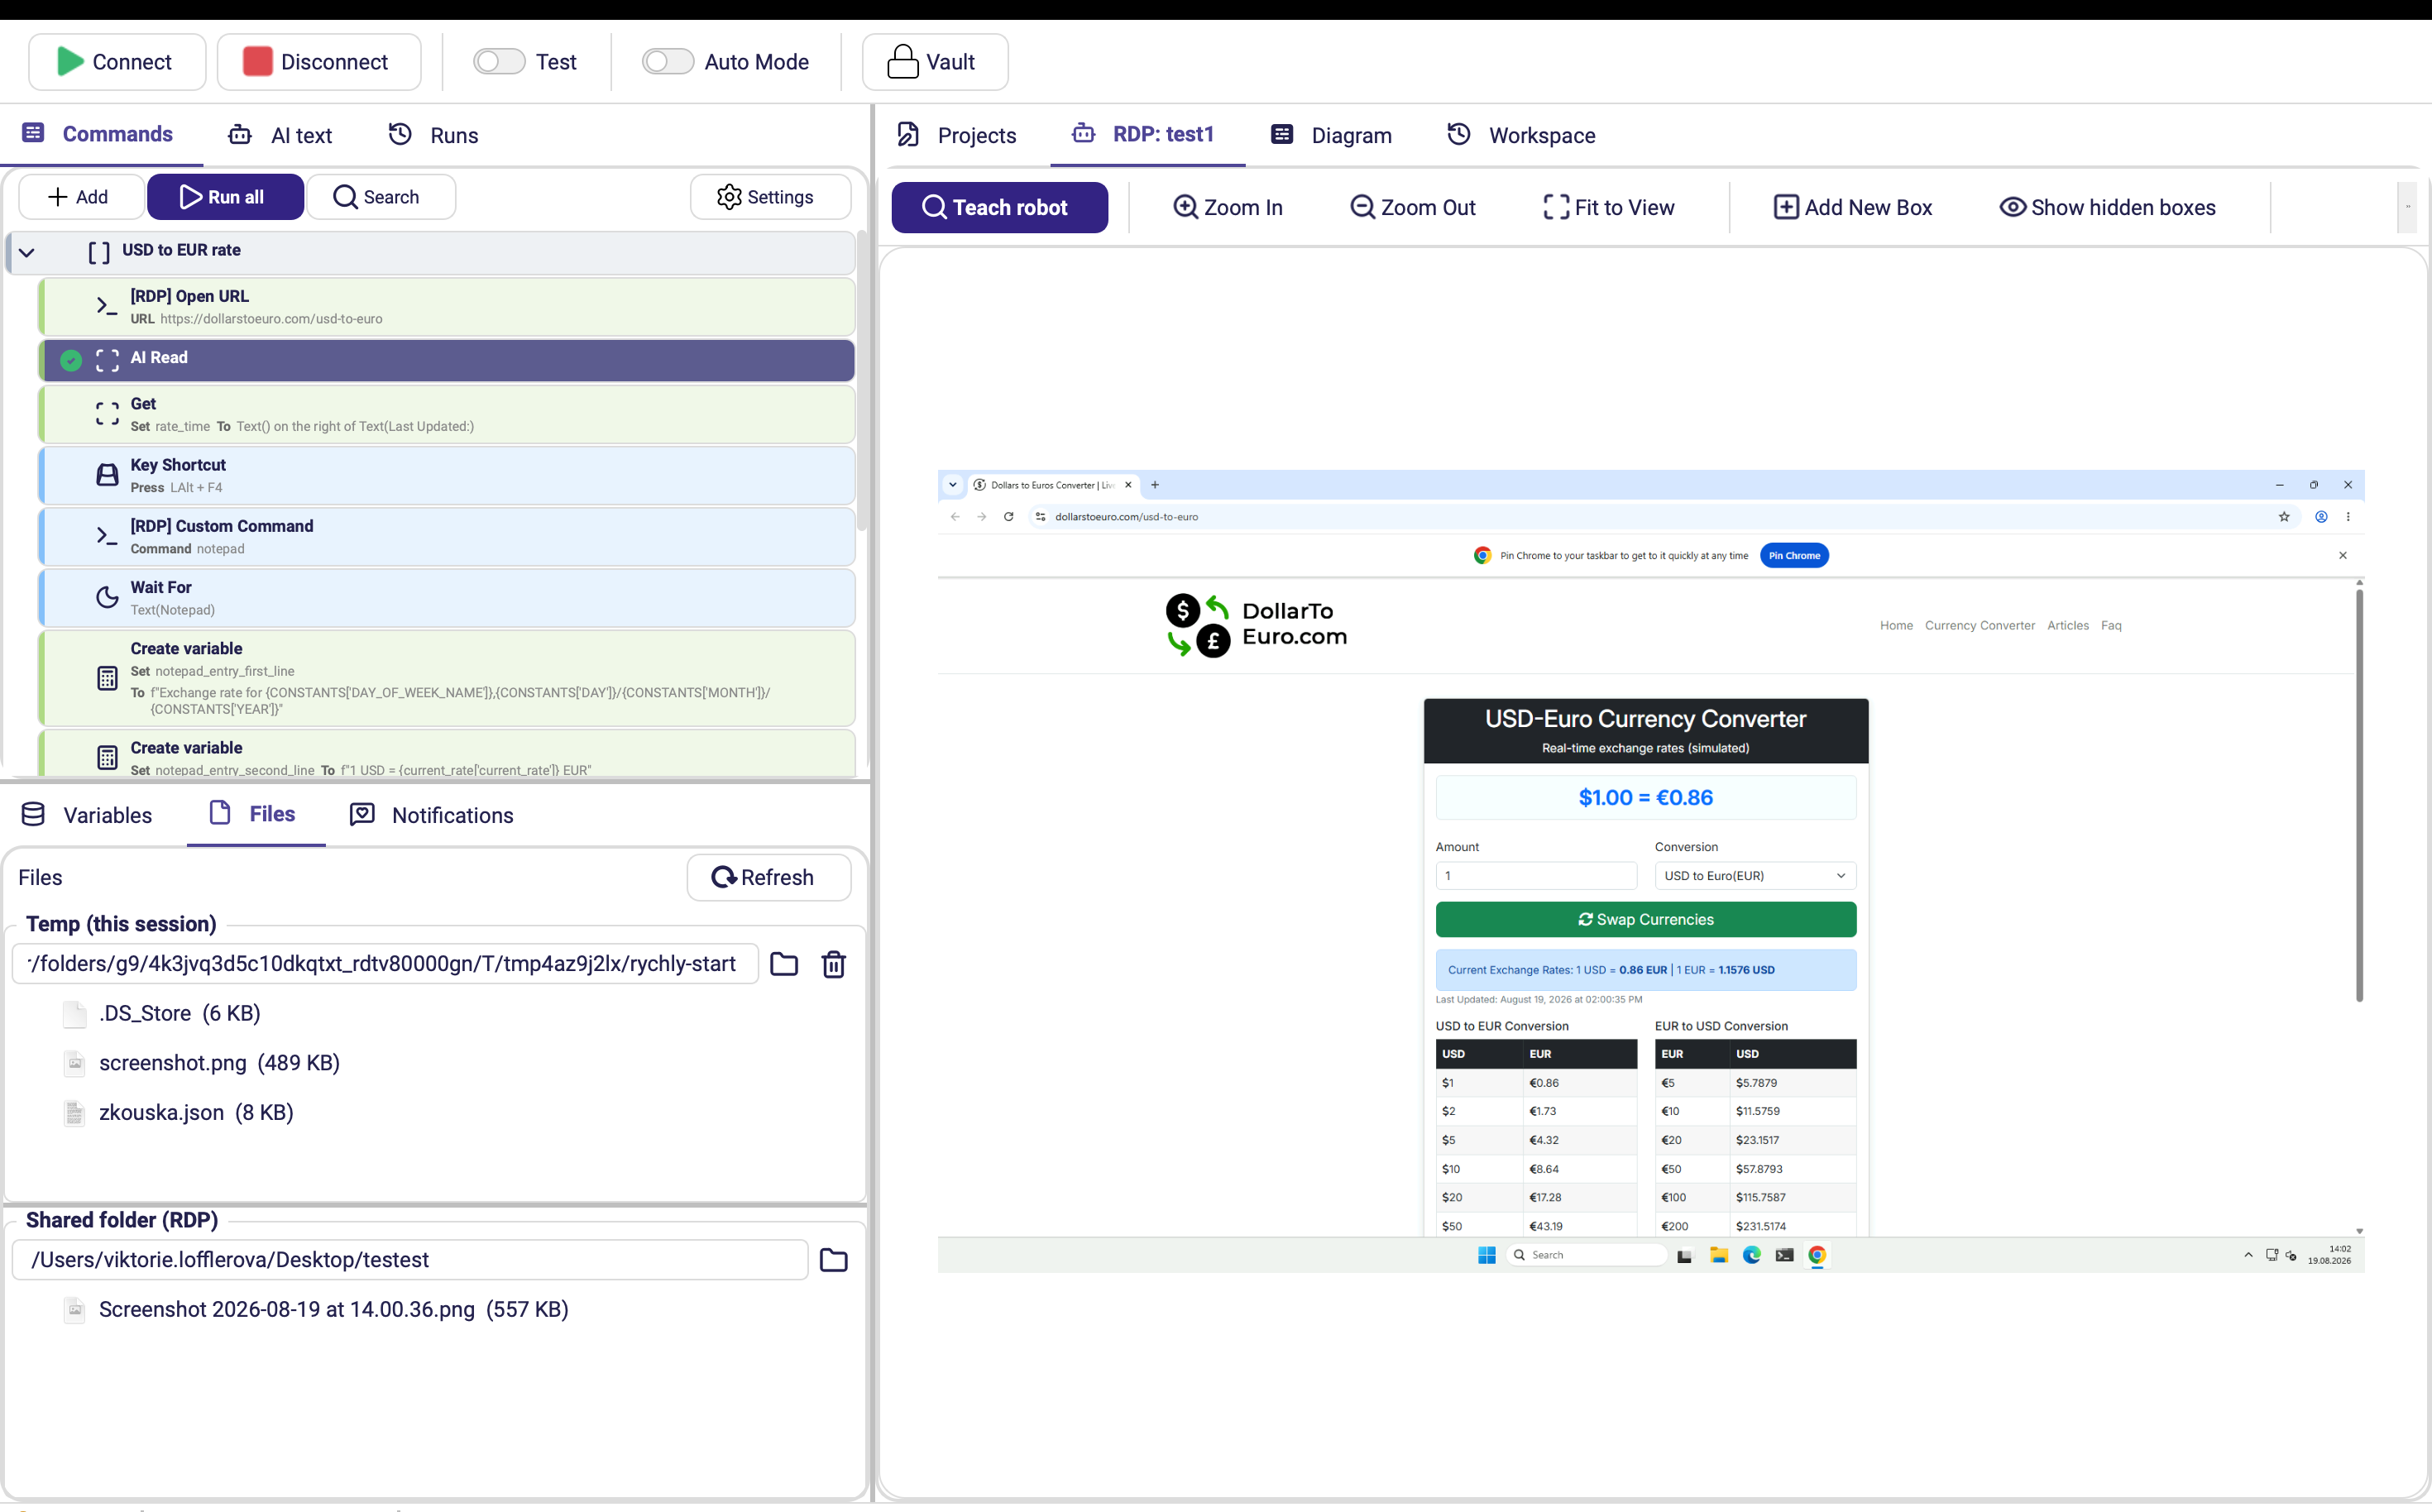
Each folder shows its path with a button to open it in the file manager, and Temp (this session) additionally has a button to empty it. Right-clicking a file offers Open, Copy path and Delete.
Keyboard shortcuts
Application
| Shortcut | Action |
|---|---|
| Ctrl+N | New Project |
| Ctrl+O | Open Project |
| Ctrl+S | Save Project |
| Ctrl+Shift+S | Save Project As |
| Ctrl+Z / Ctrl+Shift+Z | Undo / Redo |
| Shift+R | Connect to a robot |
| Shift+E | Teach robot (detect elements) |
| Ctrl+X | Clear detected elements |
With Live control set to On, these shortcuts are suspended and every keystroke goes to the controlled machine instead. Up to 0.24.0 they still fired: typing a capital R into the remote machine triggered Shift+R and tore the connection down, and combinations such as Ctrl+S or Ctrl+X ran Editor commands rather than reaching the remote application.
Insert an action
These shortcuts insert the most frequently used actions directly. The six marked (needs a target) first ask you to pick an element on screen.
| Shortcut | Action |
|---|---|
| Ctrl+Shift+X | Click (needs a target) |
| Ctrl+Shift+D | Double click (needs a target) |
| Ctrl+Shift+R | Right click (needs a target) |
| Ctrl+Shift+T | Type Text (needs a target) |
| Ctrl+Shift+G | Get (needs a target) |
| Ctrl+Shift+S | Scroll (needs a target) |
| Ctrl+Shift+K | Key Shortcut |
| Ctrl+Shift+V | Create variable |