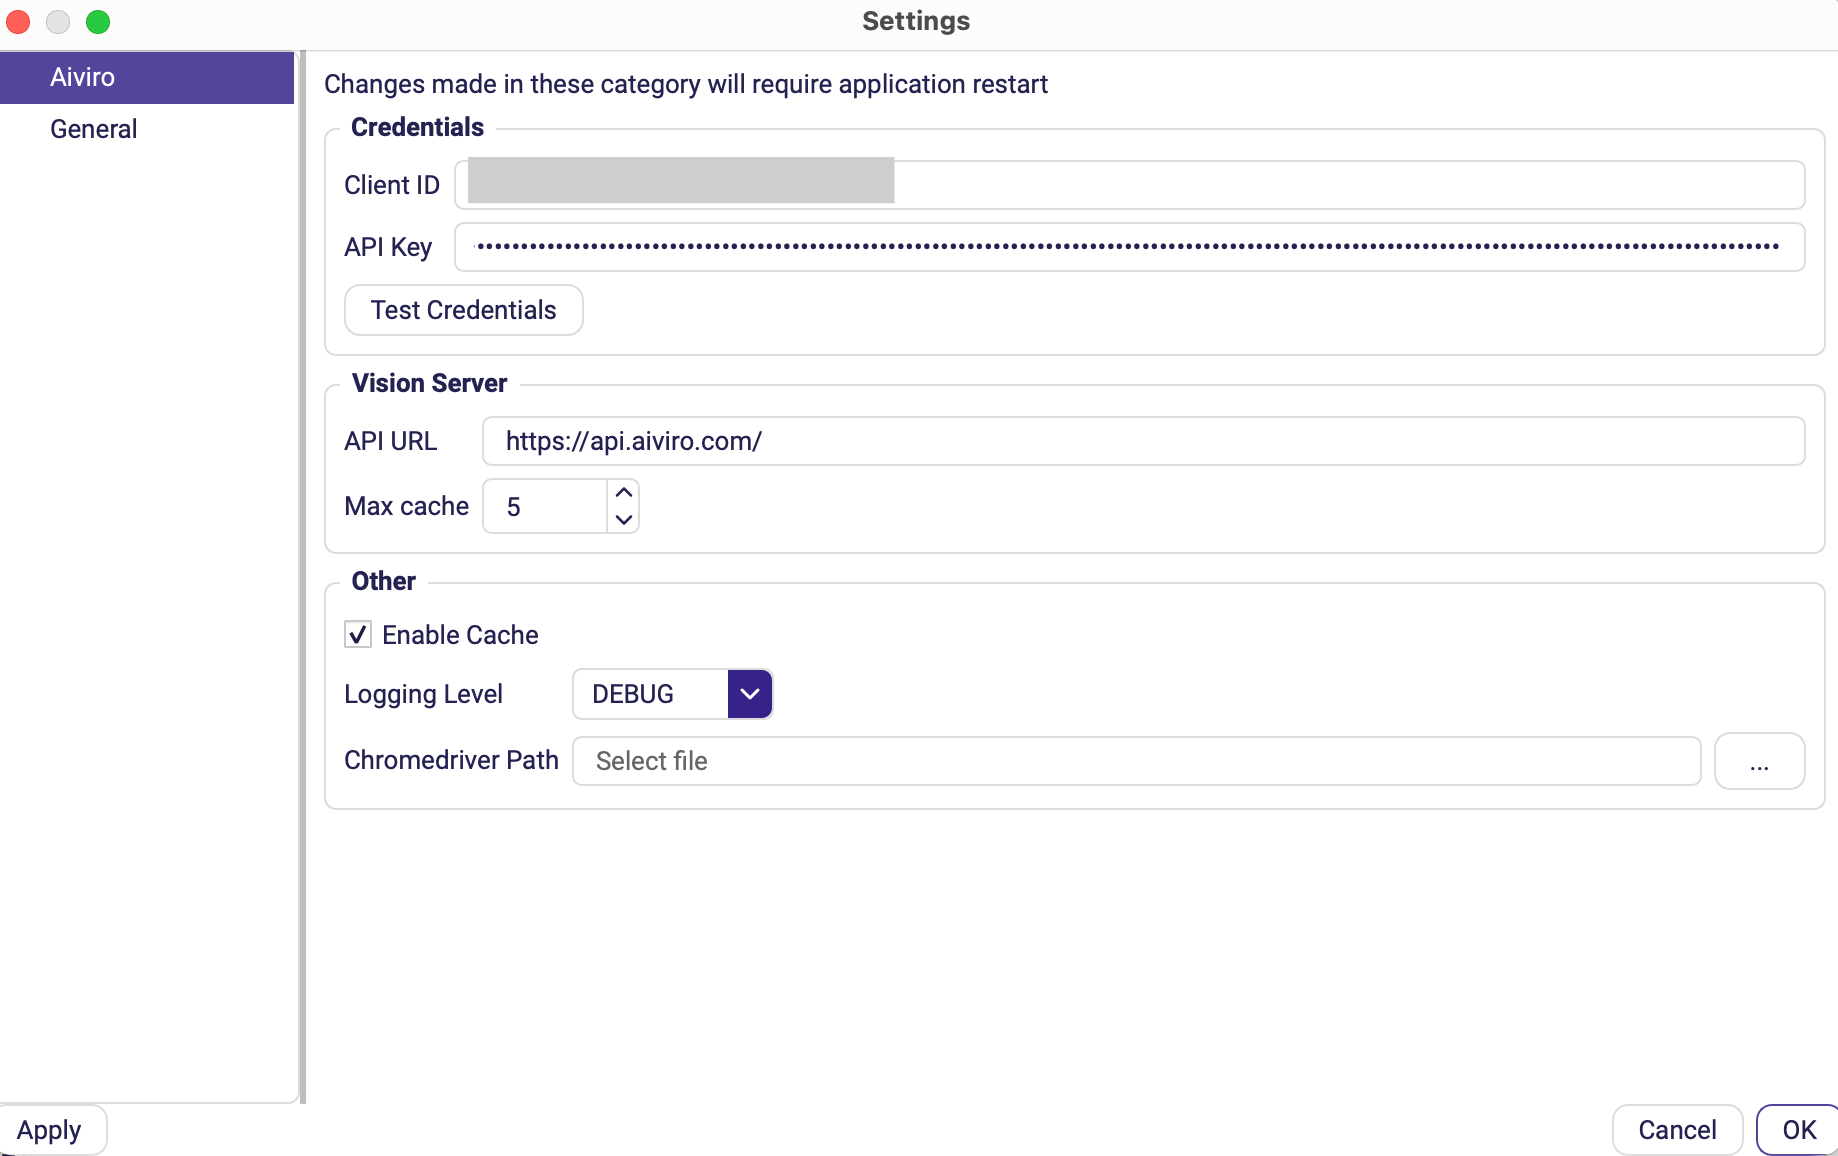
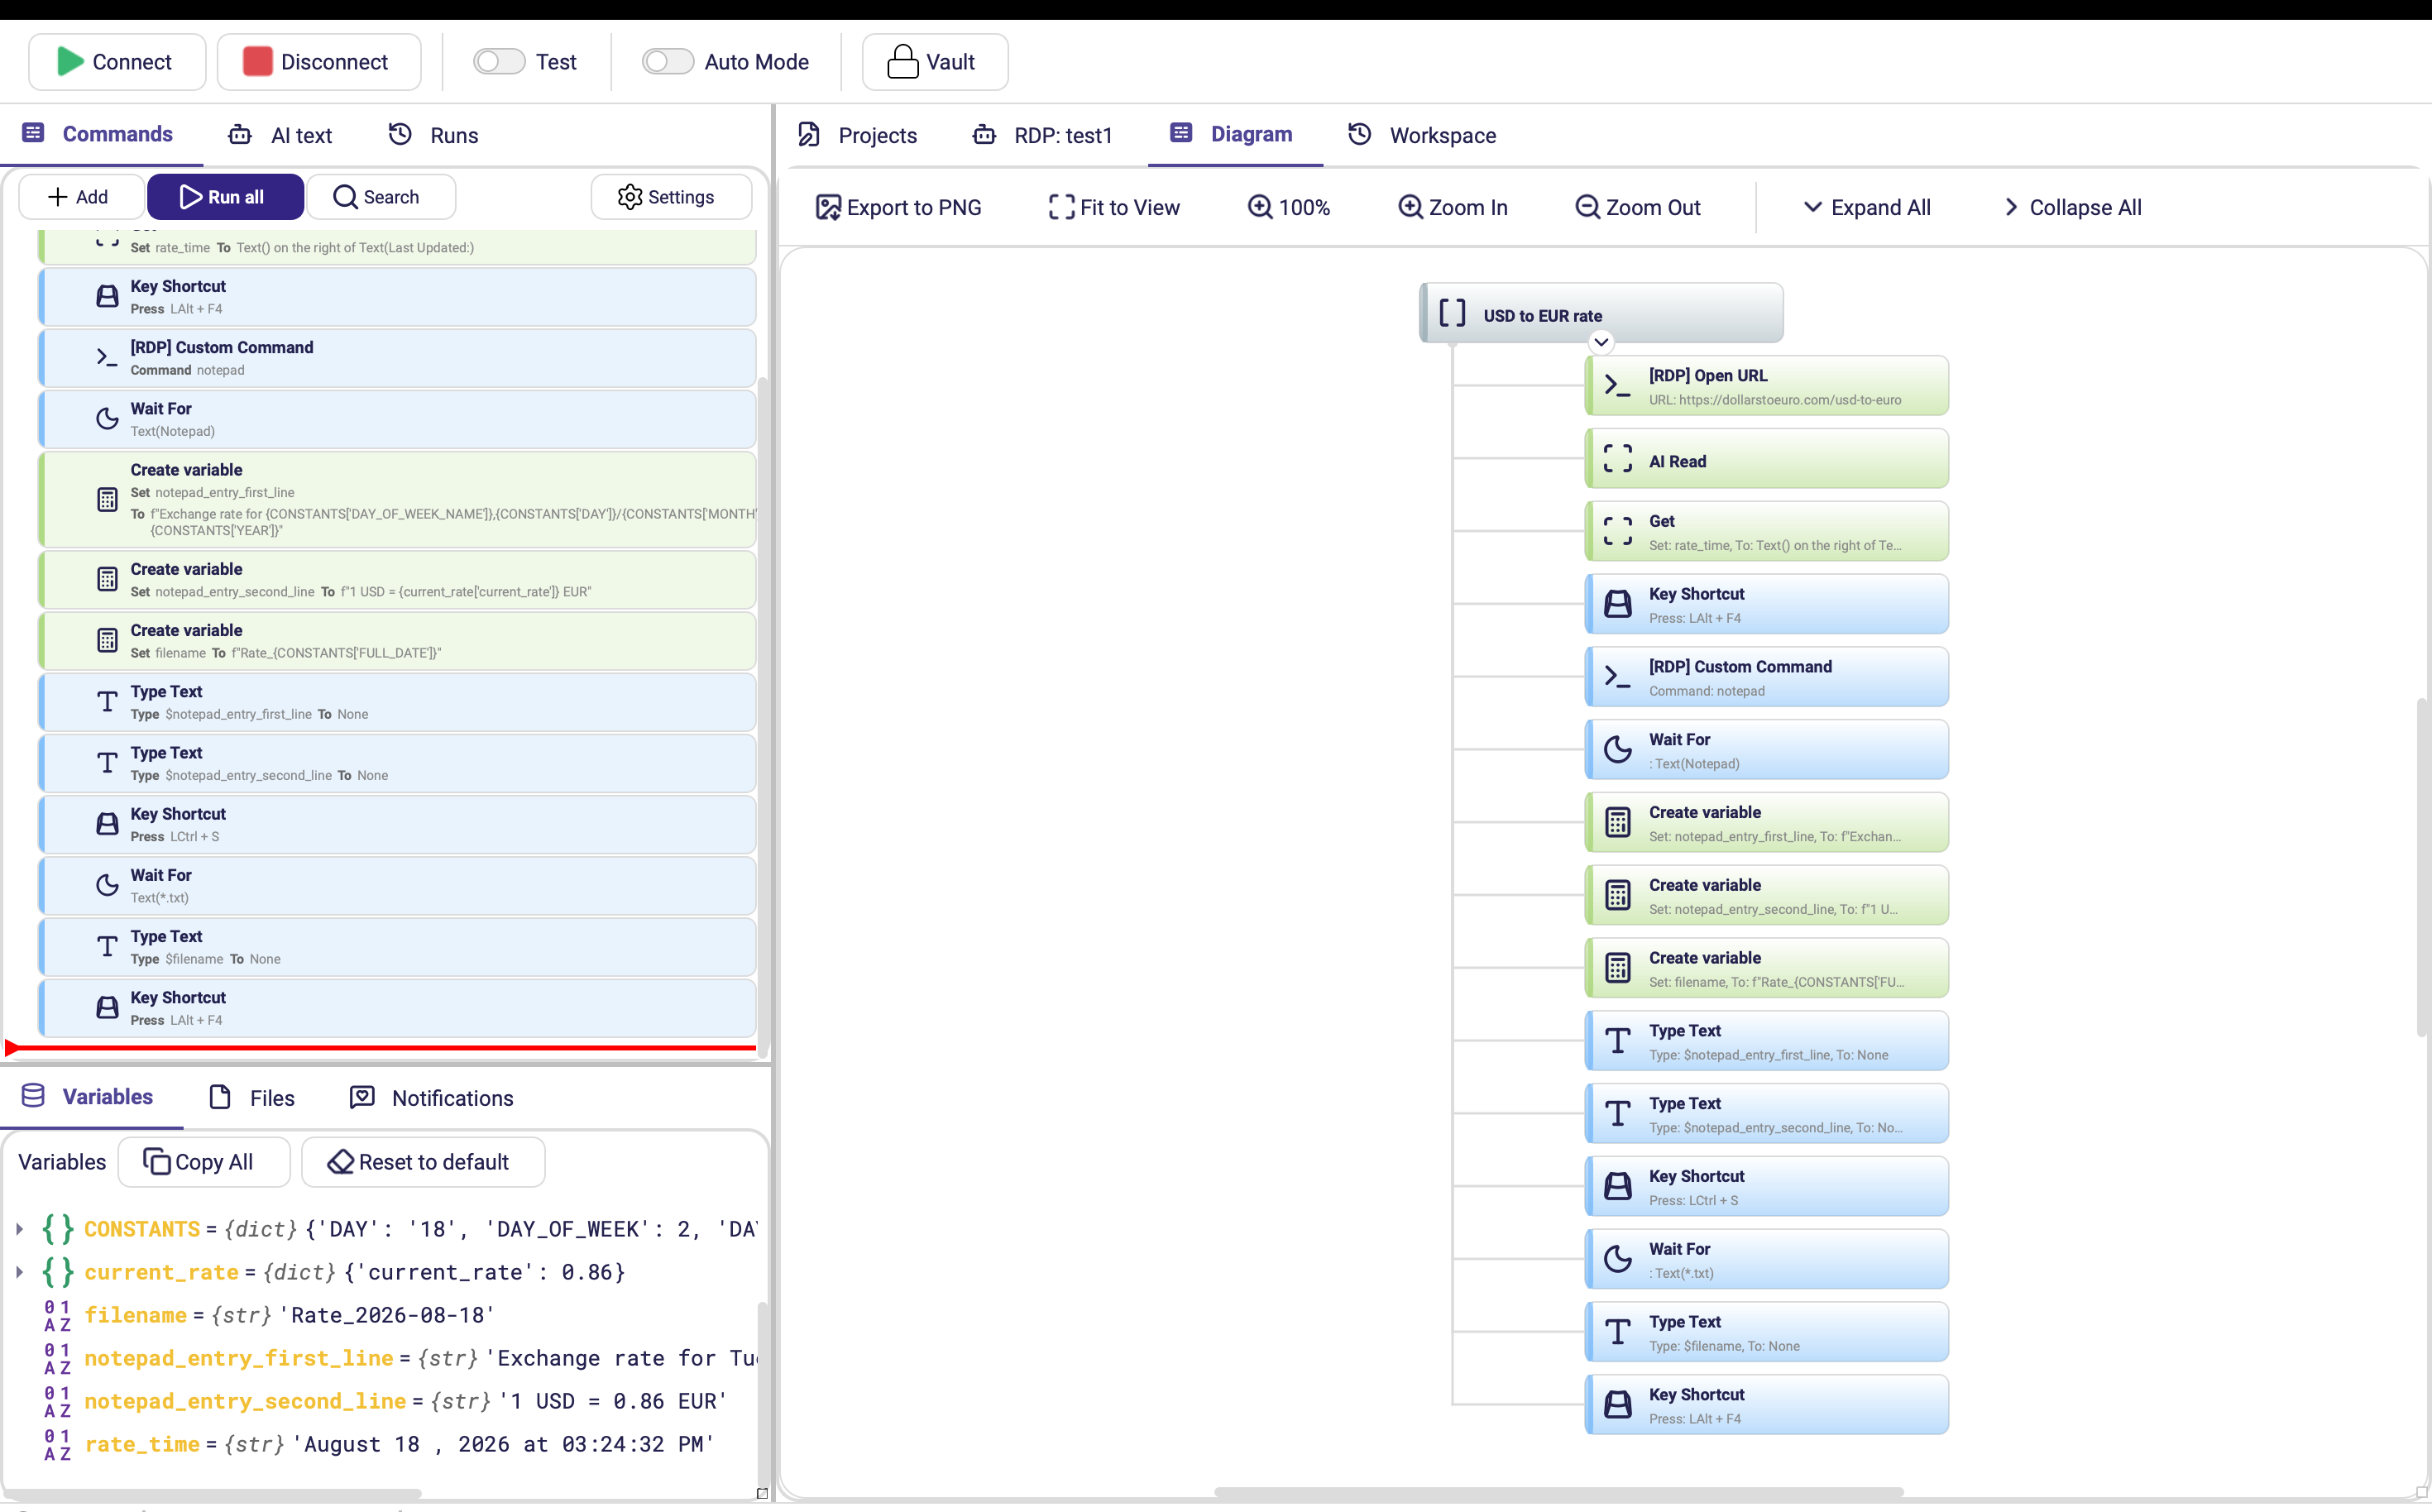
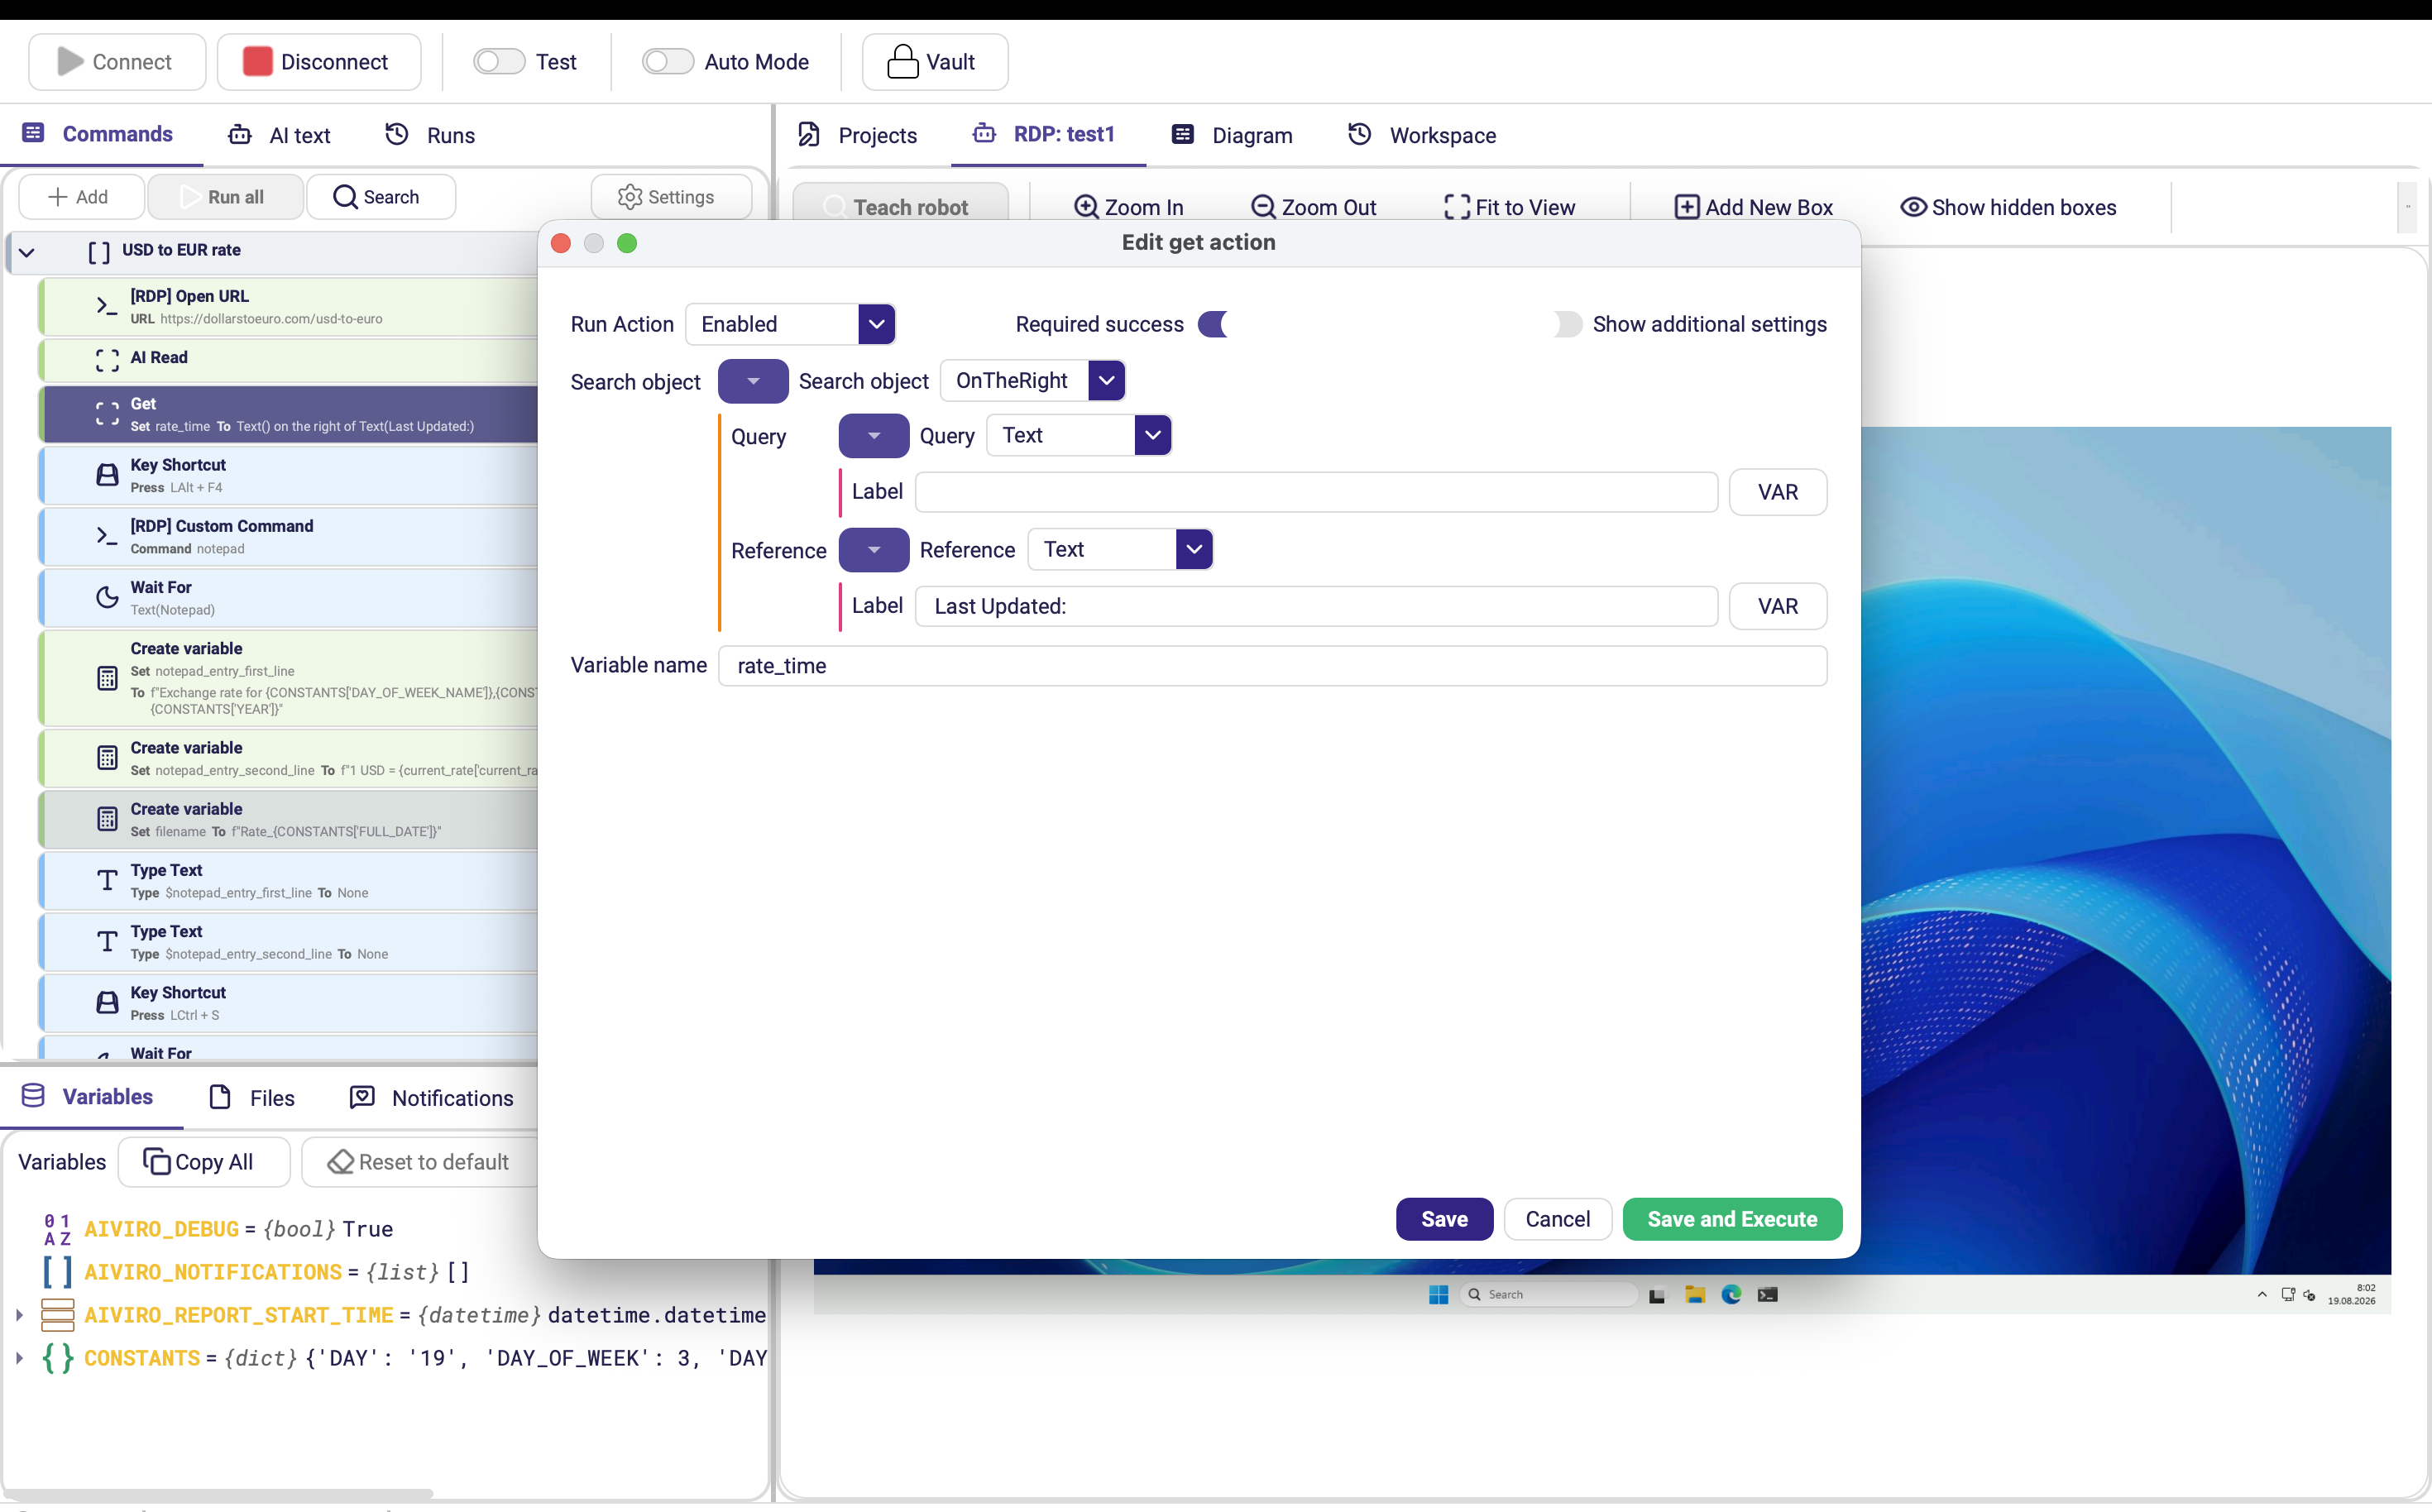
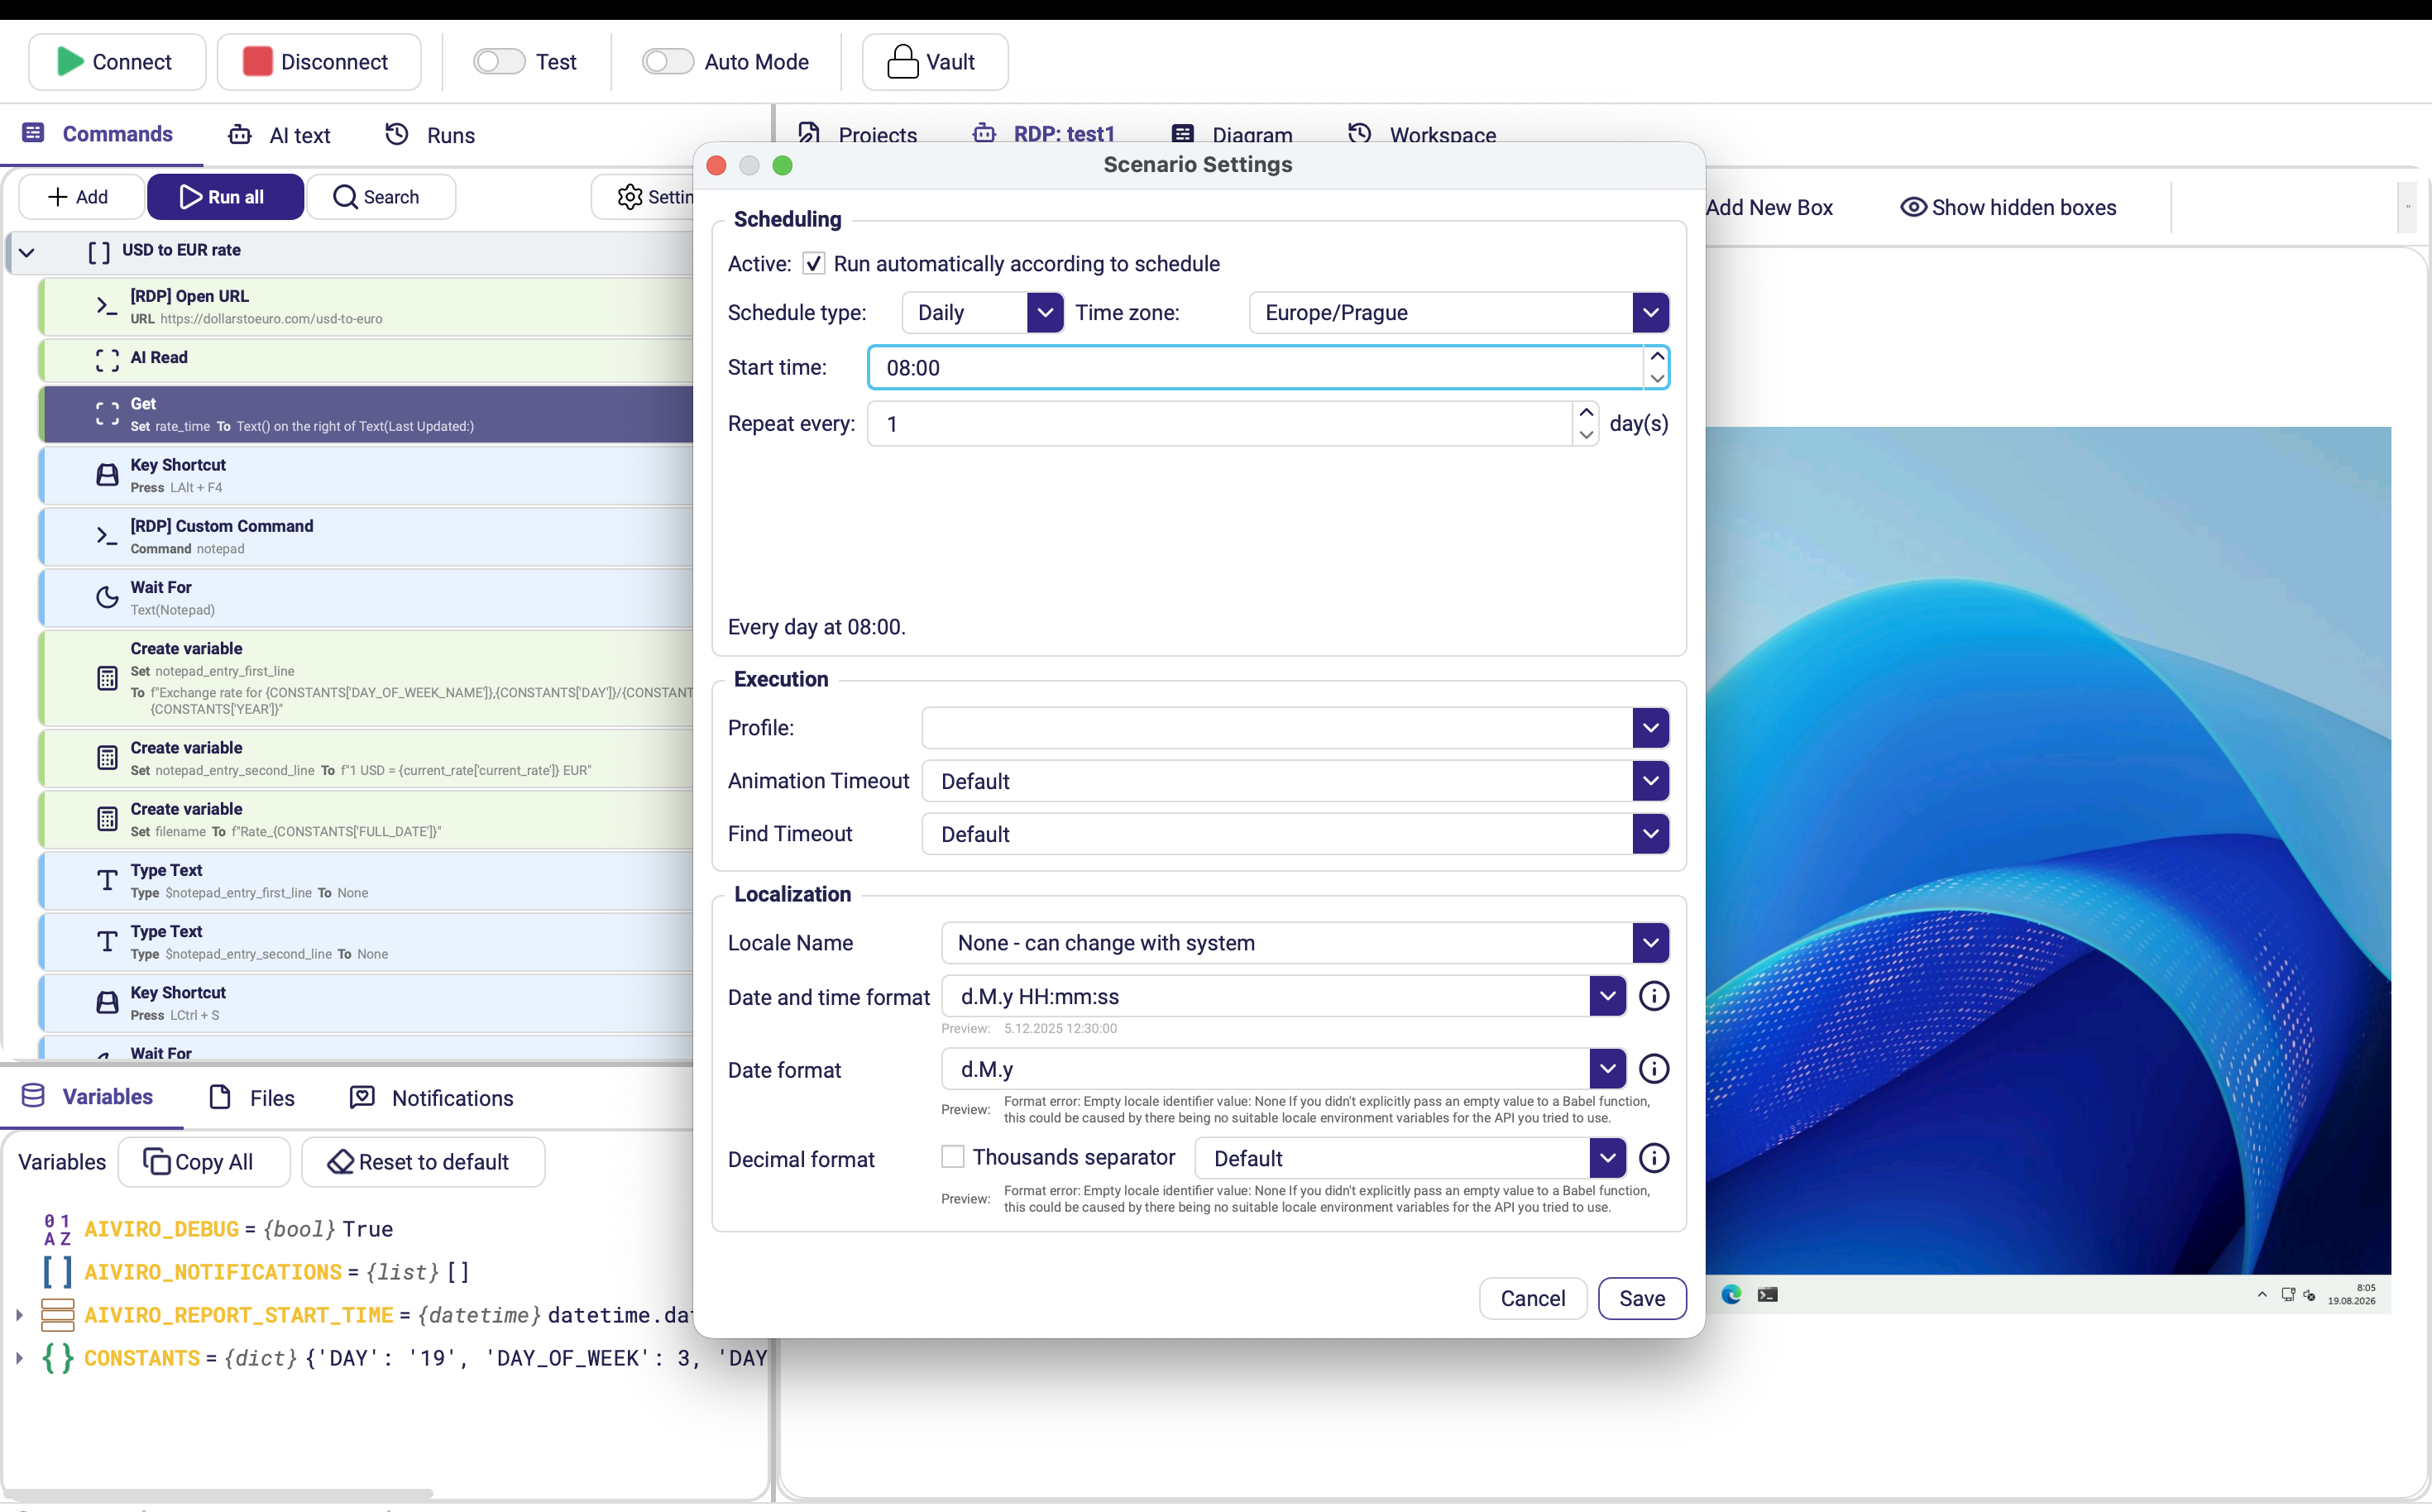
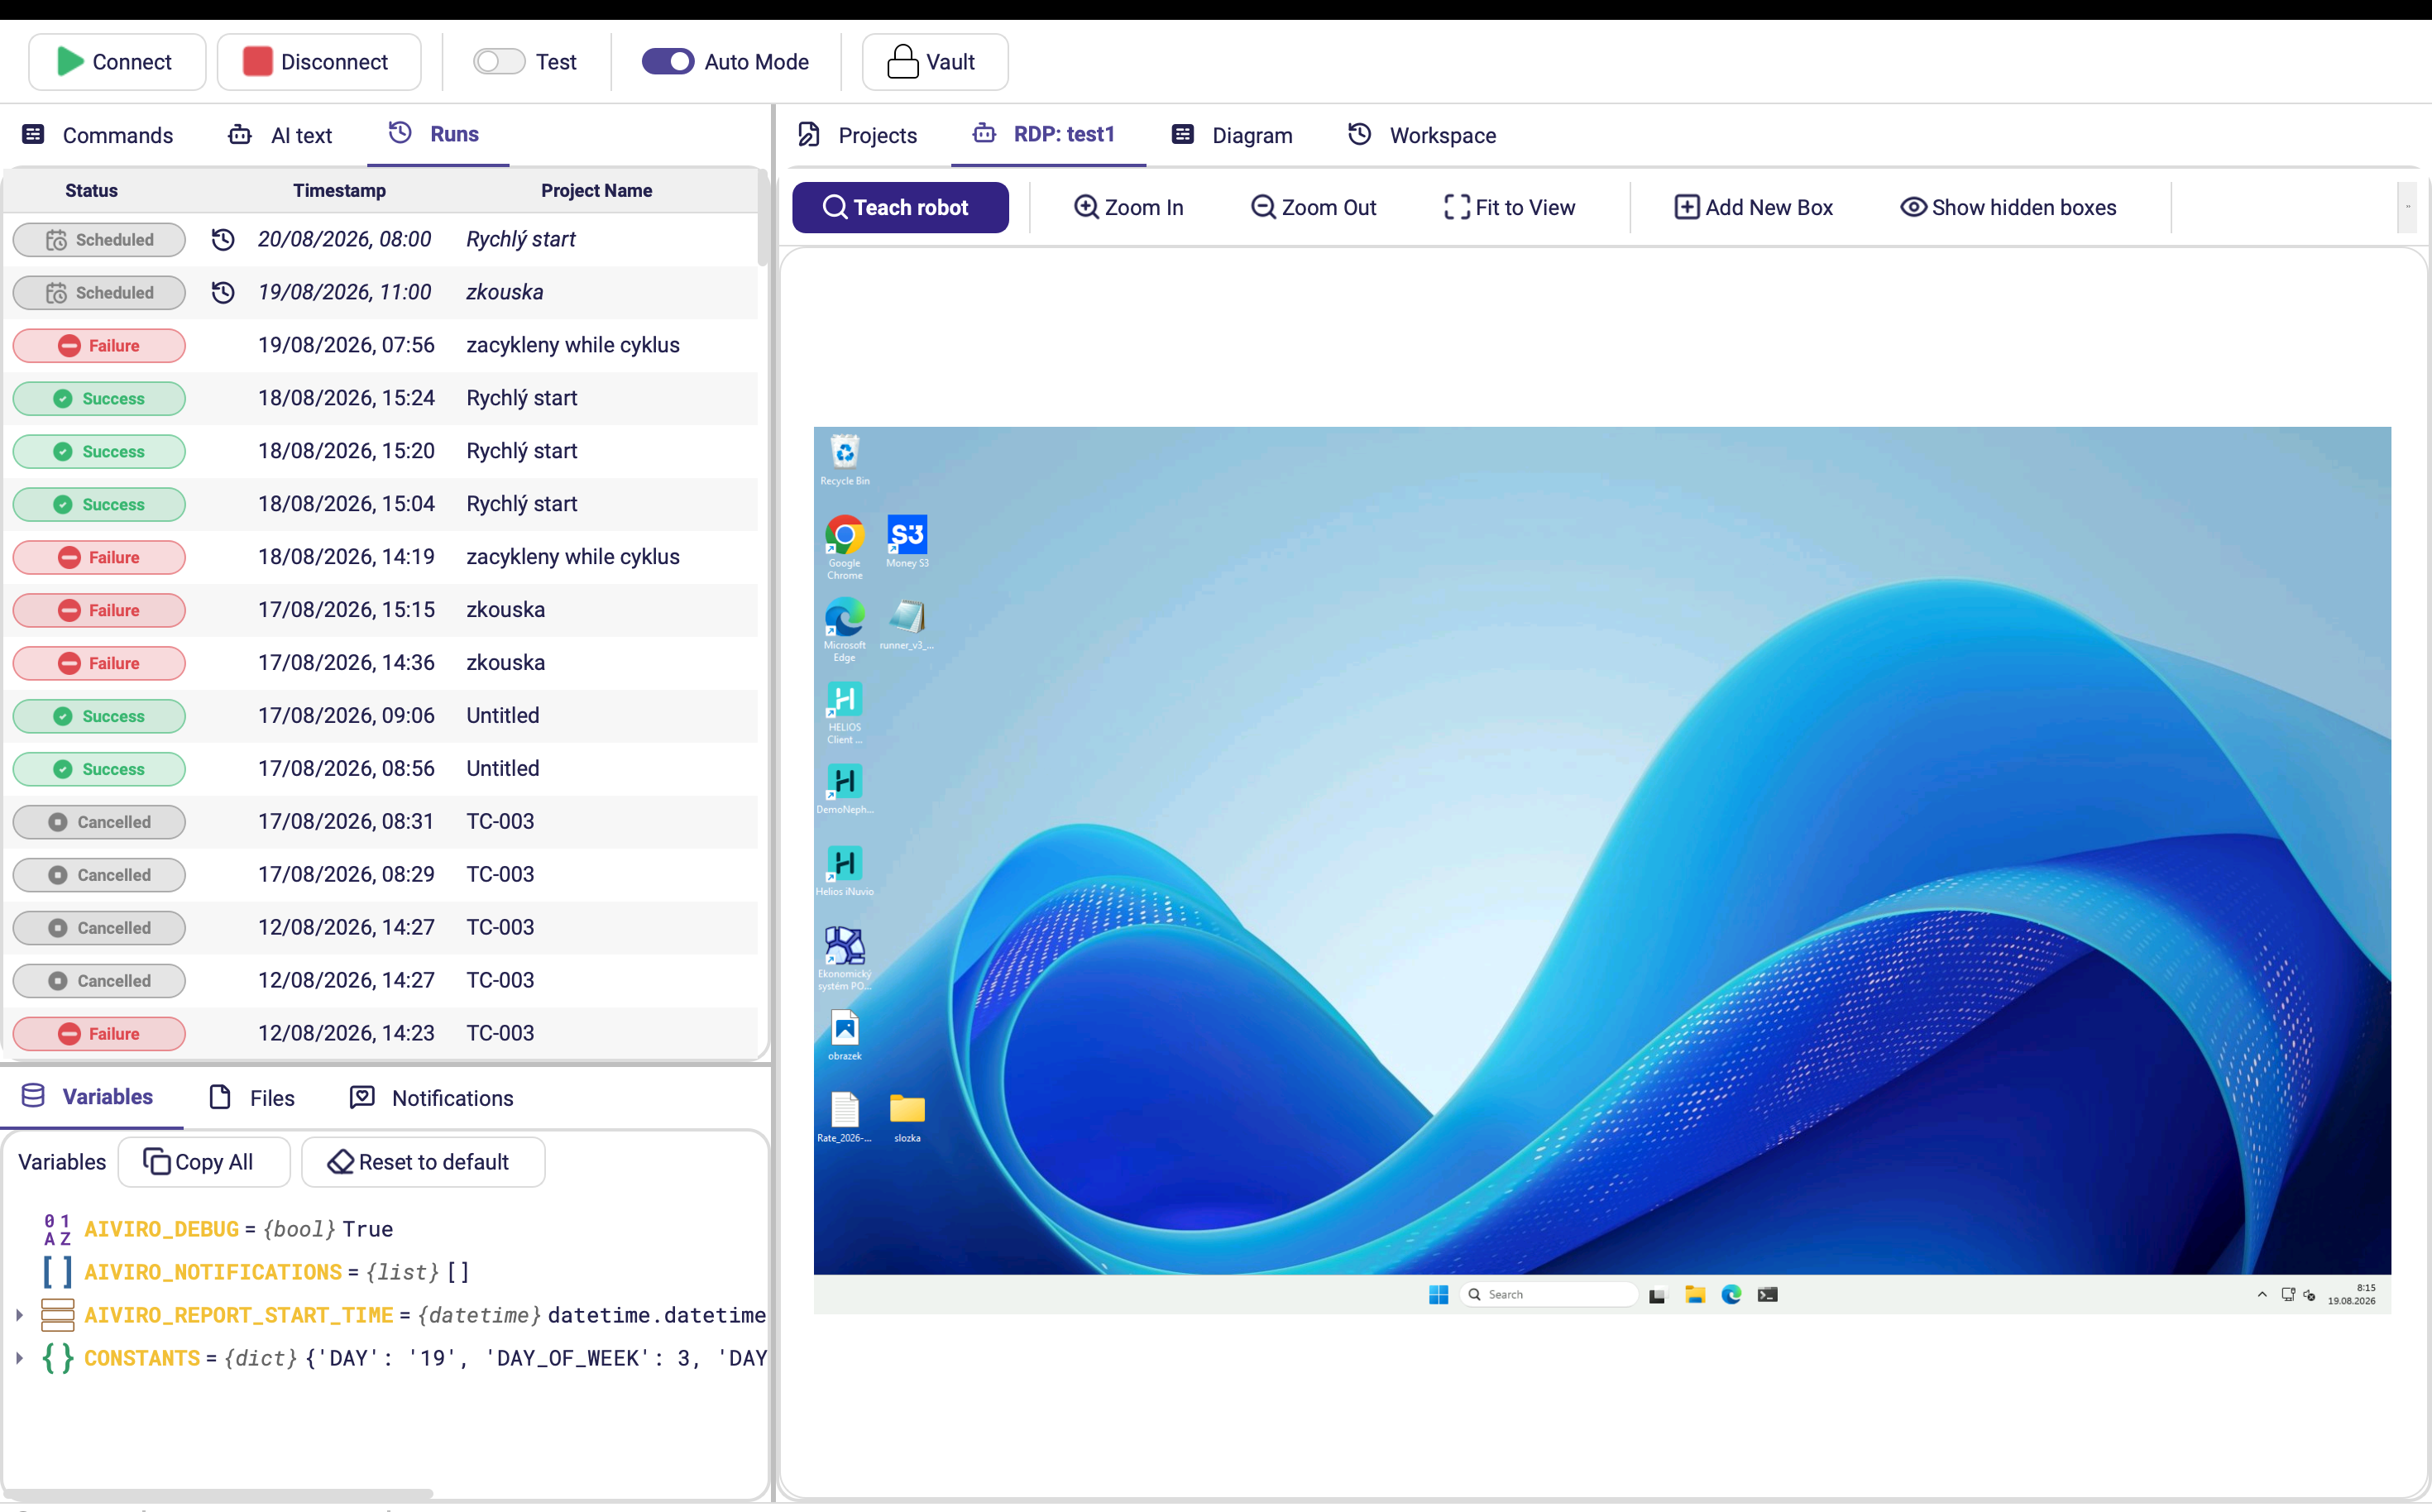
The finished scenario, exported from the Editor. Paste it into a new project.Show / copy the JSON
{
"id": "e3135ae5-4ca1-46e1-9c2b-355c999fb2e2",
"root_action": {
"obj": {
"values": {
"enable_execution": {
"value": "Enabled",
"__class__": "0x1"
}
},
"children": [
{
"values": {
"enable_execution": {
"value": "Enabled",
"__class__": "0x1"
},
"title": {
"value": "USD to EUR rate",
"__class__": "0x1"
}
},
"children": [
{
"values": {
"url": {
"value": "https://dollarstoeuro.com/usd-to-euro",
"__class__": "0x1"
},
"enable_execution": {
"value": "Enabled",
"__class__": "0x1"
},
"as_admin": {
"value": false,
"__class__": "0x4"
},
"sensitive_data": {
"value": false,
"__class__": "0x4"
},
"timeout": {
"value": 15,
"__class__": "0x5"
},
"sleep_time": {
"value": 1,
"__class__": "0x5"
}
},
"children": [],
"unique_id": "qgS5Kjm8QASDpARdiONOFg",
"__class__": "0x3"
},
{
"values": {
"enable_execution": {
"value": "Enabled",
"__class__": "0x1"
},
"source": {
"values": {
"_info": {
"value": "Processing text from current screen",
"__class__": "0x1"
}
},
"__class__": "0x7"
},
"instructions": {
"value": "get rate usd to eur \n",
"__class__": "0x1"
},
"image_context_enabled": {
"value": false,
"__class__": "0x4"
},
"source_to_save": {
"value": "current_rate",
"__class__": "0x1"
},
"values": {
"value": [
[
"current_rate",
"float"
]
],
"__class__": "0x8"
},
"json_schema": {
"value": "",
"__class__": "0x1"
}
},
"children": [],
"unique_id": "uOBGPQ3rQDunoDSBU2aaNA",
"__class__": "0x6"
},
{
"values": {
"enable_execution": {
"value": "Enabled",
"__class__": "0x1"
},
"required_success": {
"value": true,
"__class__": "0x4"
},
"search_object": {
"values": {
"query": {
"values": {
"text": {
"value": "",
"__class__": "0x1"
},
"find_method": {
"value": [
"AUTO"
],
"__class__": "0xc"
},
"element_index": {
"value": null,
"__class__": "0xd"
}
},
"__class__": "0xb"
},
"reference": {
"values": {
"text": {
"value": "Last Updated:",
"__class__": "0x1"
},
"find_method": {
"value": [
"AUTO"
],
"__class__": "0xc"
},
"element_index": {
"value": null,
"__class__": "0xd"
}
},
"__class__": "0xb"
},
"element_index": {
"value": null,
"__class__": "0xd"
},
"alignment": {
"value": true,
"__class__": "0x4"
}
},
"__class__": "0xa"
},
"variable_name": {
"value": "rate_time",
"__class__": "0x1"
},
"timeout": {
"value": 60,
"__class__": "0x5"
},
"result_type": {
"value": "text",
"__class__": "0xe"
},
"result_is_secret": {
"value": false,
"__class__": "0x4"
}
},
"children": [],
"unique_id": "bbKQko69TK-qQzcn4fjqNw",
"__class__": "0x9"
},
{
"values": {
"enable_execution": {
"value": "Enabled",
"__class__": "0x1"
},
"search_object": {
"value": null,
"__class__": "0xd"
},
"key": {
"value": [
"LEFT_ALT",
"F4"
],
"__class__": "0x10"
},
"wait": {
"__class__": "0x11"
},
"key_delay": {
"value": null,
"__class__": "0xd"
}
},
"children": [],
"unique_id": "E31W9JKeRjKy4SFJzYQkPg",
"__class__": "0xf"
},
{
"values": {
"command": {
"value": "notepad",
"__class__": "0x1"
},
"enable_execution": {
"value": "Enabled",
"__class__": "0x1"
},
"as_admin": {
"value": false,
"__class__": "0x4"
},
"sensitive_data": {
"value": false,
"__class__": "0x4"
},
"timeout": {
"value": 15,
"__class__": "0x5"
},
"sleep_time": {
"value": 1,
"__class__": "0x5"
}
},
"children": [],
"unique_id": "azt8sgEtTlyTQ2u5XzyKQw",
"__class__": "0x12"
},
{
"values": {
"enable_execution": {
"value": "Enabled",
"__class__": "0x1"
},
"required_success": {
"value": true,
"__class__": "0x4"
},
"search_object": {
"values": {
"text": {
"value": "Notepad",
"__class__": "0x1"
},
"find_method": {
"value": [
"AUTO"
],
"__class__": "0xc"
},
"element_index": {
"value": null,
"__class__": "0xd"
}
},
"__class__": "0xb"
},
"timeout": {
"value": 3,
"__class__": "0x5"
},
"ignore_timeout_exception": {
"value": false,
"__class__": "0x4"
}
},
"children": [],
"unique_id": "vtNV4DmtTRSWnnZT6i40MQ",
"__class__": "0x13"
},
{
"values": {
"enable_execution": {
"value": "Enabled",
"__class__": "0x1"
},
"assign_item": {
"name": "notepad_entry_first_line",
"expression": "f\"Exchange rate for {CONSTANTS['DAY_OF_WEEK_NAME']},{CONSTANTS['DAY']}/{CONSTANTS['MONTH']}/{CONSTANTS['YEAR']}\"",
"prompts": [],
"__class__": "0x15"
}
},
"children": [],
"unique_id": "LxiEsFIjSDyHKk00uDJpug",
"__class__": "0x14"
},
{
"values": {
"enable_execution": {
"value": "Enabled",
"__class__": "0x1"
},
"assign_item": {
"name": "notepad_entry_second_line",
"expression": "f\"1 USD = {current_rate['current_rate']} EUR\"",
"prompts": [],
"__class__": "0x15"
}
},
"children": [],
"unique_id": "q1JQEWDyQ1qGuzrx4OVOaA",
"__class__": "0x14"
},
{
"values": {
"enable_execution": {
"value": "Enabled",
"__class__": "0x1"
},
"assign_item": {
"name": "filename",
"expression": "f\"Rate_{CONSTANTS['FULL_DATE']}\"",
"prompts": [],
"__class__": "0x15"
}
},
"children": [],
"unique_id": "U-nHGsjeQLW0skRl5VFYRg",
"__class__": "0x14"
},
{
"values": {
"enable_execution": {
"value": "Enabled",
"__class__": "0x1"
},
"required_success": {
"value": true,
"__class__": "0x4"
},
"search_object": {
"value": null,
"__class__": "0xd"
},
"text": {
"value": "notepad_entry_first_line",
"__class__": "0x17"
},
"wait": {
"__class__": "0x11"
},
"per_char_sleep_time": {
"value": null,
"__class__": "0xd"
},
"clear": {
"value": false,
"__class__": "0x4"
},
"key": {
"value": [
"ENTER"
],
"__class__": "0x10"
}
},
"children": [],
"unique_id": "eXyik8hNTnGlcoLWJiH9PA",
"__class__": "0x16"
},
{
"values": {
"enable_execution": {
"value": "Enabled",
"__class__": "0x1"
},
"required_success": {
"value": true,
"__class__": "0x4"
},
"search_object": {
"value": null,
"__class__": "0xd"
},
"text": {
"value": "notepad_entry_second_line",
"__class__": "0x17"
},
"wait": {
"__class__": "0x11"
},
"per_char_sleep_time": {
"value": null,
"__class__": "0xd"
},
"clear": {
"value": false,
"__class__": "0x4"
},
"key": {
"value": [
"ENTER"
],
"__class__": "0x10"
}
},
"children": [],
"unique_id": "N7PWVpq-QravoOVXmZXKuA",
"__class__": "0x16"
},
{
"values": {
"enable_execution": {
"value": "Enabled",
"__class__": "0x1"
},
"search_object": {
"value": null,
"__class__": "0xd"
},
"key": {
"value": [
"LEFT_CONTROL",
"KEY_S"
],
"__class__": "0x10"
},
"wait": {
"__class__": "0x11"
},
"key_delay": {
"value": null,
"__class__": "0xd"
}
},
"children": [],
"unique_id": "6ispLPoxS32VAwzBMcrouw",
"__class__": "0xf"
},
{
"values": {
"enable_execution": {
"value": "Enabled",
"__class__": "0x1"
},
"required_success": {
"value": true,
"__class__": "0x4"
},
"search_object": {
"values": {
"text": {
"value": "*.txt",
"__class__": "0x1"
},
"find_method": {
"value": [
"AUTO"
],
"__class__": "0xc"
},
"element_index": {
"value": null,
"__class__": "0xd"
}
},
"__class__": "0xb"
},
"timeout": {
"value": 3,
"__class__": "0x5"
},
"ignore_timeout_exception": {
"value": false,
"__class__": "0x4"
}
},
"children": [],
"unique_id": "-pwZeUIMT5i7gY2XqorvGg",
"__class__": "0x13"
},
{
"values": {
"enable_execution": {
"value": "Enabled",
"__class__": "0x1"
},
"required_success": {
"value": true,
"__class__": "0x4"
},
"search_object": {
"value": null,
"__class__": "0xd"
},
"text": {
"value": "filename",
"__class__": "0x17"
},
"wait": {
"__class__": "0x11"
},
"per_char_sleep_time": {
"value": null,
"__class__": "0xd"
},
"clear": {
"value": false,
"__class__": "0x4"
},
"key": {
"value": [
"ENTER"
],
"__class__": "0x10"
}
},
"children": [],
"unique_id": "BDOuRJYYTmOUa9JE78hv8g",
"__class__": "0x16"
},
{
"values": {
"enable_execution": {
"value": "Enabled",
"__class__": "0x1"
},
"search_object": {
"value": null,
"__class__": "0xd"
},
"key": {
"value": [
"LEFT_ALT",
"F4"
],
"__class__": "0x10"
},
"wait": {
"__class__": "0x11"
},
"key_delay": {
"value": null,
"__class__": "0xd"
}
},
"children": [],
"unique_id": "AXnz5Km8TxCXpUAWKLxw0A",
"__class__": "0xf"
}
],
"unique_id": "E1CH-2bqSXSbnk09jPQheA",
"__class__": "0x2"
}
],
"unique_id": "84z0ioNdQNmnxib9RhnDKw",
"__class__": "0x0"
},
"__mapping__": {
"0x0": [
"aiviro_editor.actions.block",
"ActionBlock"
],
"0x1": [
"aiviro_editor.parameters.primitive",
"StrValue"
],
"0x2": [
"aiviro_editor.actions.markup",
"Section"
],
"0x3": [
"aiviro_editor.actions.other",
"RDPOpenUrl"
],
"0x4": [
"aiviro_editor.parameters.primitive",
"BoolValue"
],
"0x5": [
"aiviro_editor.parameters.primitive",
"IntValue"
],
"0x6": [
"aiviro_editor.actions.ai",
"ProcessTextAction"
],
"0x7": [
"aiviro_editor.parameters.misc",
"ScreenSourceValue"
],
"0x8": [
"aiviro_editor.parameters.misc",
"KeywordValueValue"
],
"0x9": [
"aiviro_editor.actions.input_actions",
"GetAction"
],
"0xa": [
"aiviro_editor.parameters.aiviro_positional",
"OnTheRightElementValue"
],
"0xb": [
"aiviro_editor.parameters.aiviro_internal",
"TextElementValue"
],
"0xc": [
"aiviro_editor.parameters.aiviro_common",
"FindMethodValue"
],
"0xd": [
"aiviro_editor.parameters.primitive",
"NoneValue"
],
"0xe": [
"aiviro_editor.parameters.misc",
"GetCommandResultValue"
],
"0xf": [
"aiviro_editor.actions.keyboard_actions",
"KeyShortcut"
],
"0x10": [
"aiviro_editor.parameters.aiviro_common",
"BaseKeyValue"
],
"0x11": [
"aiviro_editor.parameters.primitive",
"ImplicitWaitValue"
],
"0x12": [
"aiviro_editor.actions.other",
"StartProcessRDPAction"
],
"0x13": [
"aiviro_editor.actions.input_actions",
"WaitForAction"
],
"0x14": [
"aiviro_editor.actions.other",
"AssignAction"
],
"0x15": [
"aiviro_editor.parameters.misc",
"VariableDropdownDataValue"
],
"0x16": [
"aiviro_editor.actions.keyboard_actions",
"TypeText"
],
"0x17": [
"aiviro_editor.parameters.variable",
"VariableValue"
]
}
},
"schedule": {
"config": null,
"auto_schedule": false,
"run_profile": ""
},
"settings": {
"implicit_wait_timeout": null,
"animation_timeout": null,
"locale_name": "en_US",
"locale_formats": {
"datetime": {
"format": "d.M.y HH:mm:ss"
},
"date": {
"format": "d.M.y"
},
"decimal": {
"format": null,
"group_separator": false
}
},
"scenario_prompt": null,
"ai_descriptions": {
"-pwZeUIMT5i7gY2XqorvGg": {
"high": "Wait for the \"*.txt\" save field to appear.",
"low": "Wait for a text to appear (label=\"*.txt\", timeout=3)."
},
"6ispLPoxS32VAwzBMcrouw": {
"high": "Press Ctrl+S to save the file.",
"low": "Press a key shortcut (key=[\"LEFT_CONTROL\", \"KEY_S\"])."
},
"AXnz5Km8TxCXpUAWKLxw0A": {
"high": "Press Alt+F4 to exit.",
"low": "Press a key shortcut (key=[\"LEFT_ALT\", \"F4\"])."
},
"BDOuRJYYTmOUa9JE78hv8g": {
"high": "Type the filename into the focused field and press Enter.",
"low": "Type (text=variable(filename), key=[\"ENTER\"])."
},
"E1CH-2bqSXSbnk09jPQheA": {
"high": "Create a section for the USD to EUR rate steps.",
"low": "Group actions as a section (title=\"USD to EUR rate\")."
},
"E31W9JKeRjKy4SFJzYQkPg": {
"high": "Press Alt+F4 to close the window.",
"low": "Press a key shortcut (key=[\"LEFT_ALT\", \"F4\"])."
},
"LxiEsFIjSDyHKk00uDJpug": {
"high": "Create the first line for the Notepad entry.",
"low": "Assign a value to a variable (name=\"notepad_entry_first_line\", value=\"f\\\"Exchange rate for {CONSTANTS['DAY_OF_WEEK_NAME']},{CONSTANTS['DAY']}/{CONSTANTS['MONTH']}/{CONSTANTS['YEAR']}\\\"\")."
},
"N7PWVpq-QravoOVXmZXKuA": {
"high": "Type the second line into the focused field and press Enter.",
"low": "Type (text=variable(notepad_entry_second_line), key=[\"ENTER\"])."
},
"U-nHGsjeQLW0skRl5VFYRg": {
"high": "Create the output filename from the current date.",
"low": "Assign a value to a variable (name=\"filename\", value=\"f\\\"Rate_{CONSTANTS['FULL_DATE']}\\\"\")."
},
"azt8sgEtTlyTQ2u5XzyKQw": {
"high": "Start Notepad in RDP.",
"low": "Start a process in RDP (command=\"notepad\")."
},
"bbKQko69TK-qQzcn4fjqNw": {
"high": "Get the time next to \"Last Updated:\".",
"low": "Get data from an element below a text (text=\"Last Updated\") (variable_name=\"rate_time\")."
},
"eXyik8hNTnGlcoLWJiH9PA": {
"high": "Type the first line into the focused field and press Enter.",
"low": "Type (text=variable(notepad_entry_first_line), key=[\"ENTER\"])."
},
"q1JQEWDyQ1qGuzrx4OVOaA": {
"high": "Create the second line with the current exchange rate.",
"low": "Assign a value to a variable (name=\"notepad_entry_second_line\", value=\"f\\\"1 USD = {current_rate['current_rate']} EUR\\\"\")."
},
"qgS5Kjm8QASDpARdiONOFg": {
"high": "Open the USD to EUR page in RDP.",
"low": "Open a URL via RDP (url=\"https://dollarstoeuro.com/usd-to-euro\")."
},
"uOBGPQ3rQDunoDSBU2aaNA": {
"high": "Extract the current USD to EUR rate from the screen.",
"low": "Process text from the current screen (instructions=\"get rate usd to eur \n\", image_context_enabled=false, source=\"current screen\", source_to_save=\"current_rate\", values=[[\"current_rate\", \"float\"]], data_type=\"ProcessTextAction\")."
},
"vtNV4DmtTRSWnnZT6i40MQ": {
"high": "Wait for Notepad to appear.",
"low": "Wait for a text to appear (label=\"Notepad\", timeout=3)."
}
}
}
}